DIY Soldering Project 155 LED Canton Tower
Deceptively simple in design, yet demanding in execution, our DIY 155 LED Canton Tower project is the ultimate test of soldering skill and determination. With only a few steps to completion, it’s easy to underestimate the challenge ahead. But make no mistake – this project requires precision, patience, and persistence. Each of the 155 LEDs demands a perfect solder joint, and consistency is key to achieving a stunning visual effect. If you’re ready to push your soldering skills to the limit and create a truly show-stopping piece, join us on this epic DIY adventure!
What’s Included in Your DIY 155 LED Canton Tower Kit: –
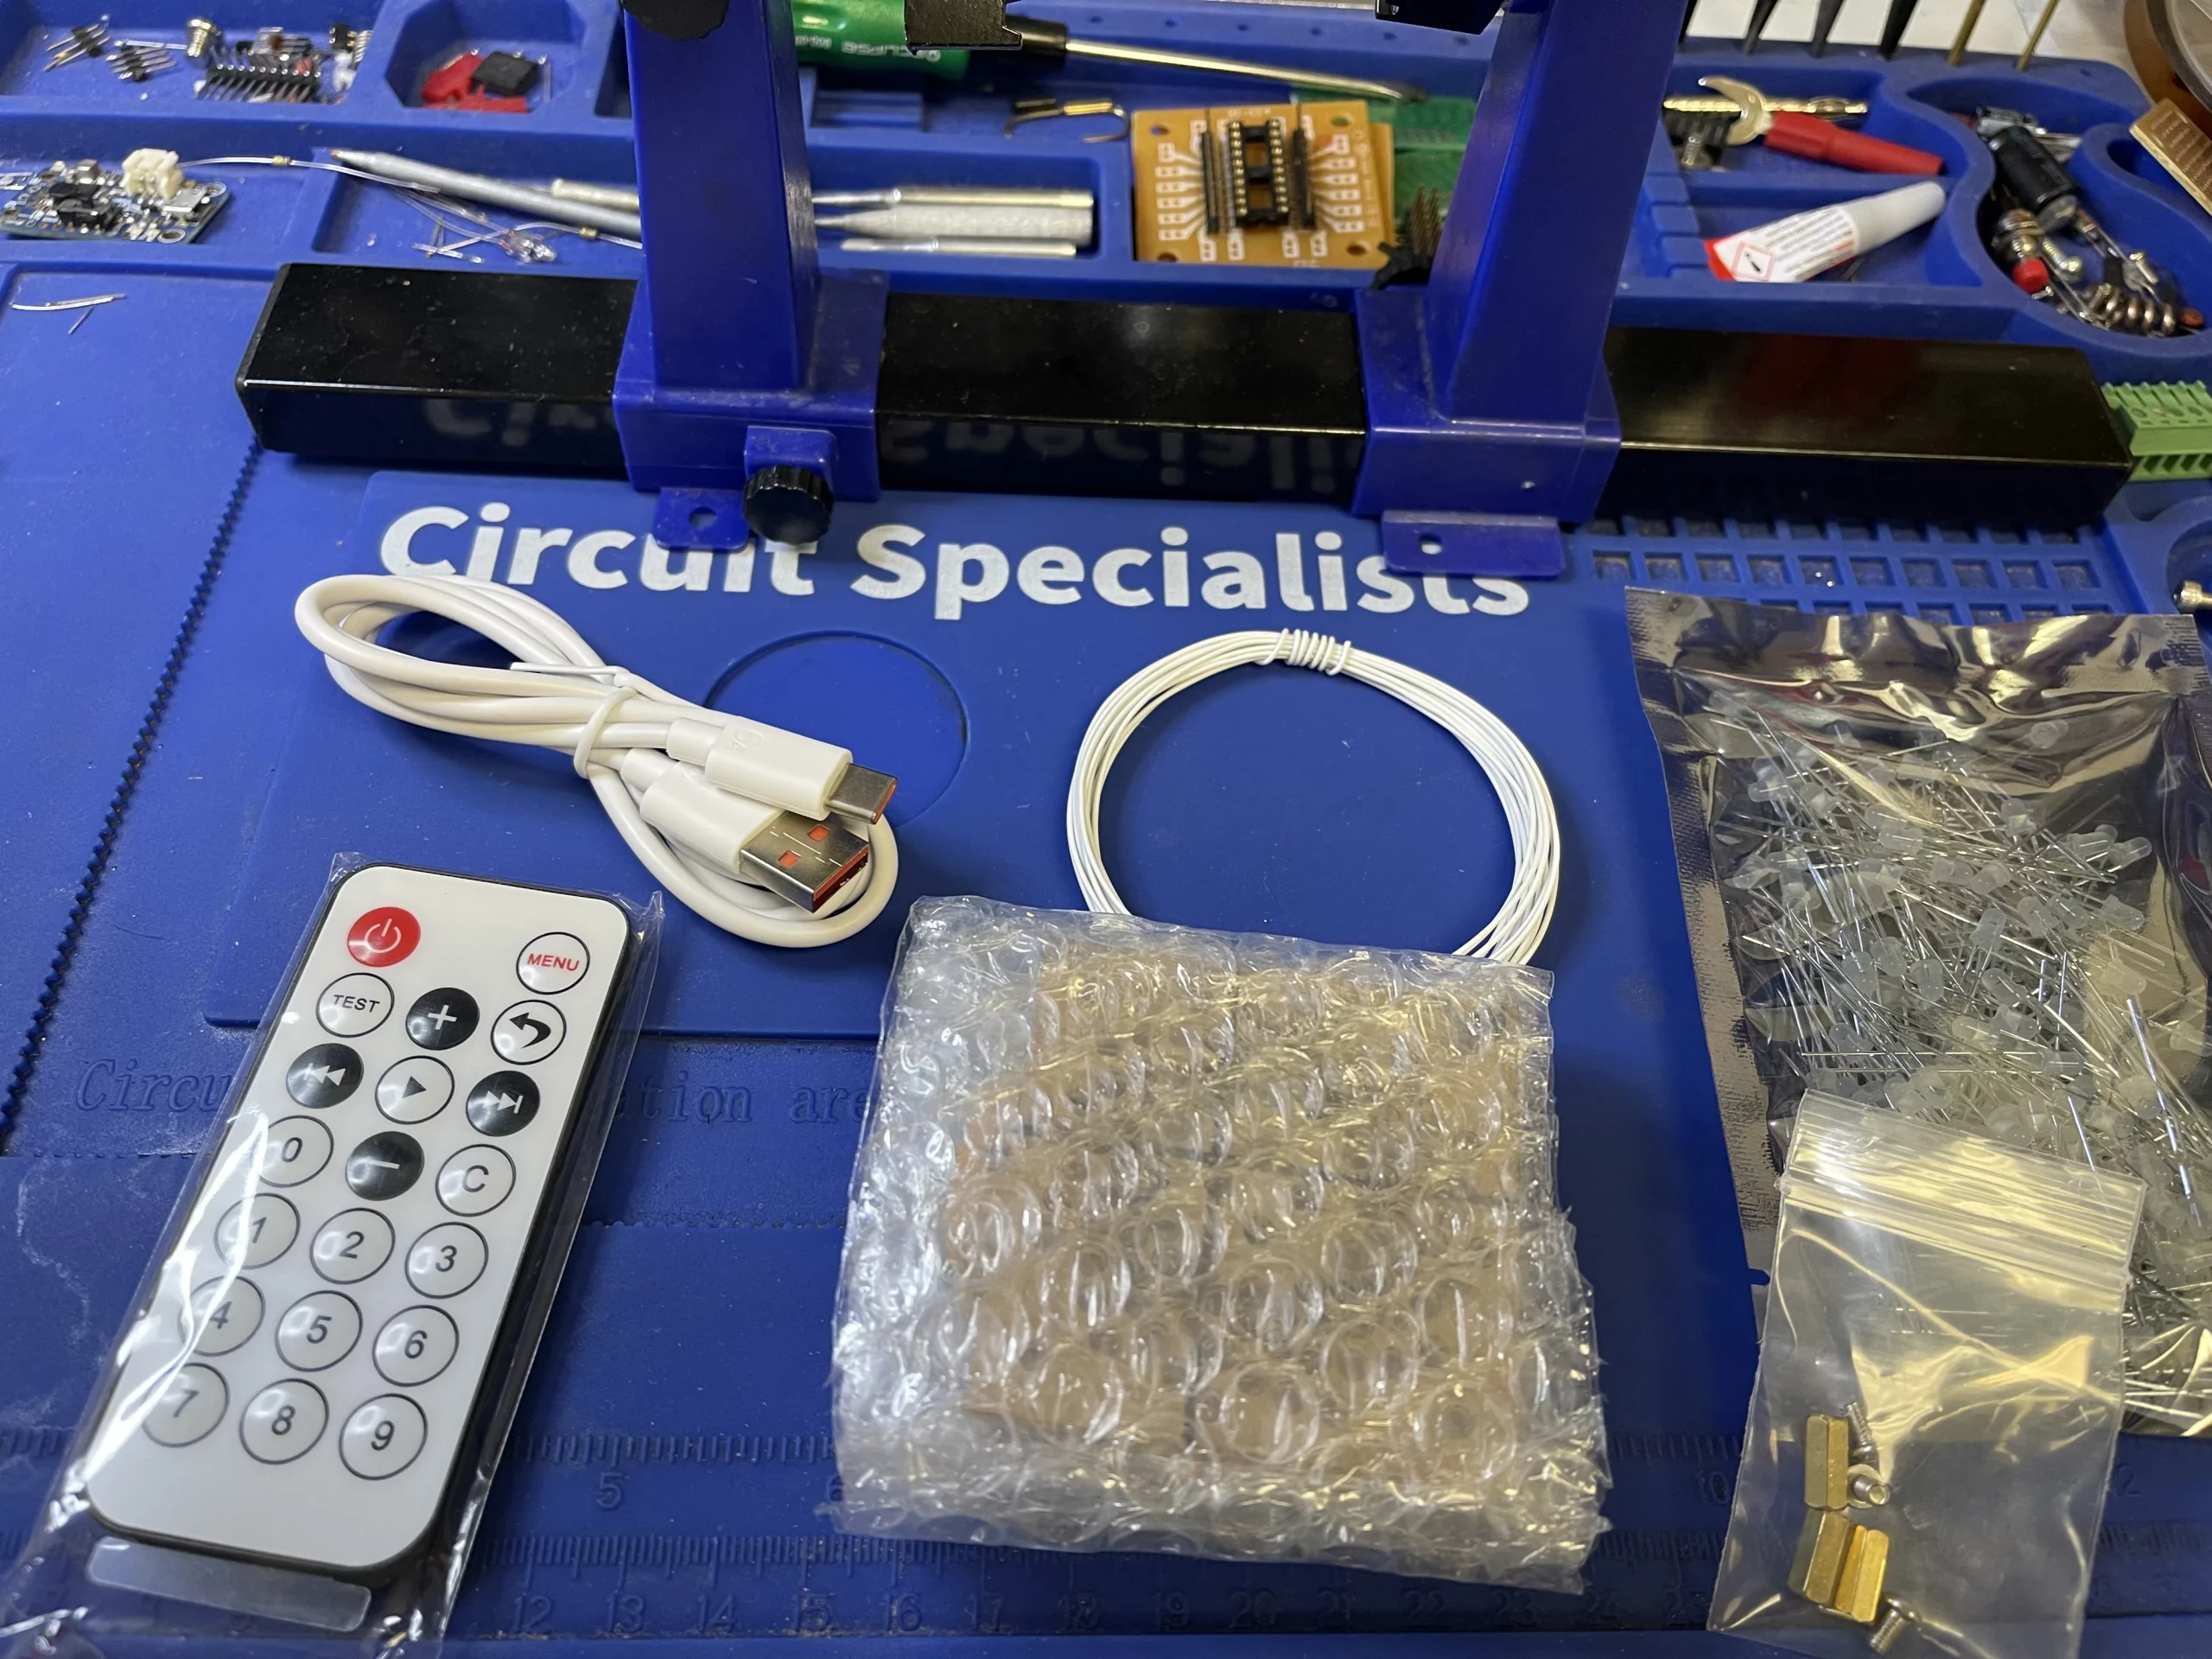
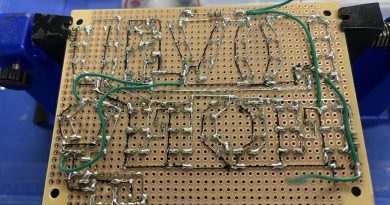
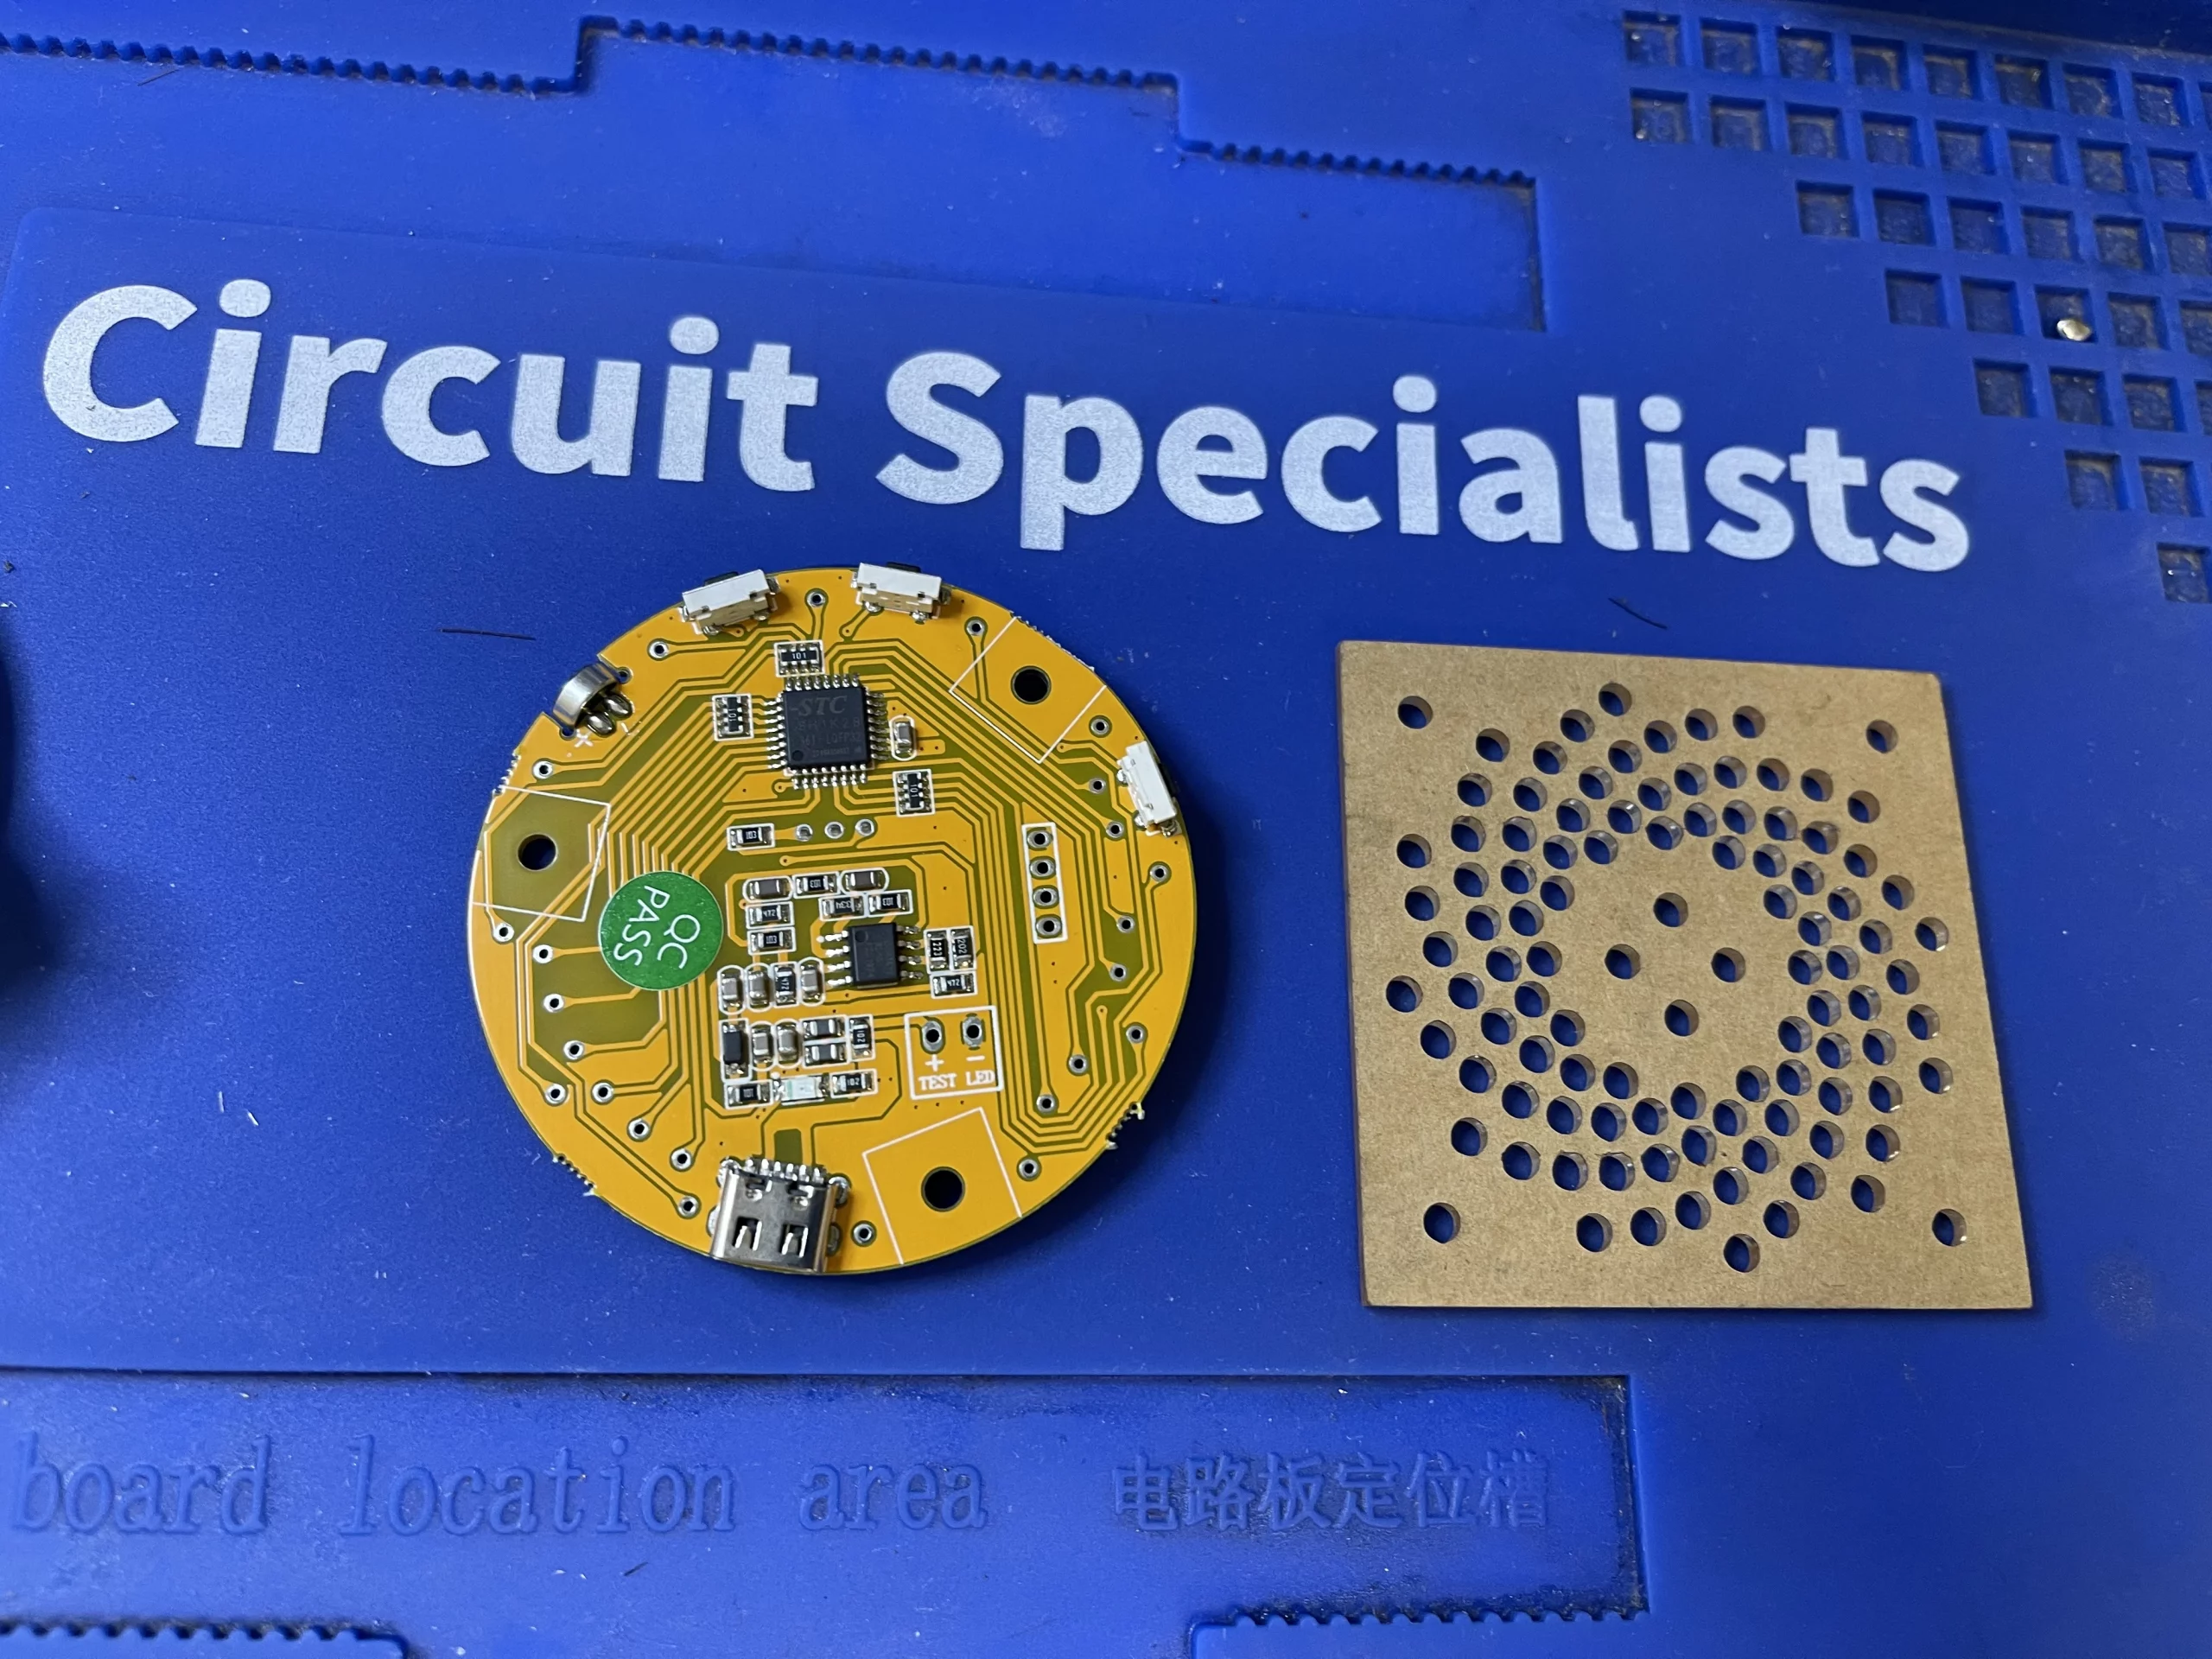
- Soldered and tested mainboard (6×6 cm) – the foundation of your project
- 4 Copper posts and screws – for secure and stable assembly
- 1 USB cable – for easy power connection
- 1 White electronic line – for neat and organized wiring
- 1 Arcerlic template- for auxiliary welding and added support
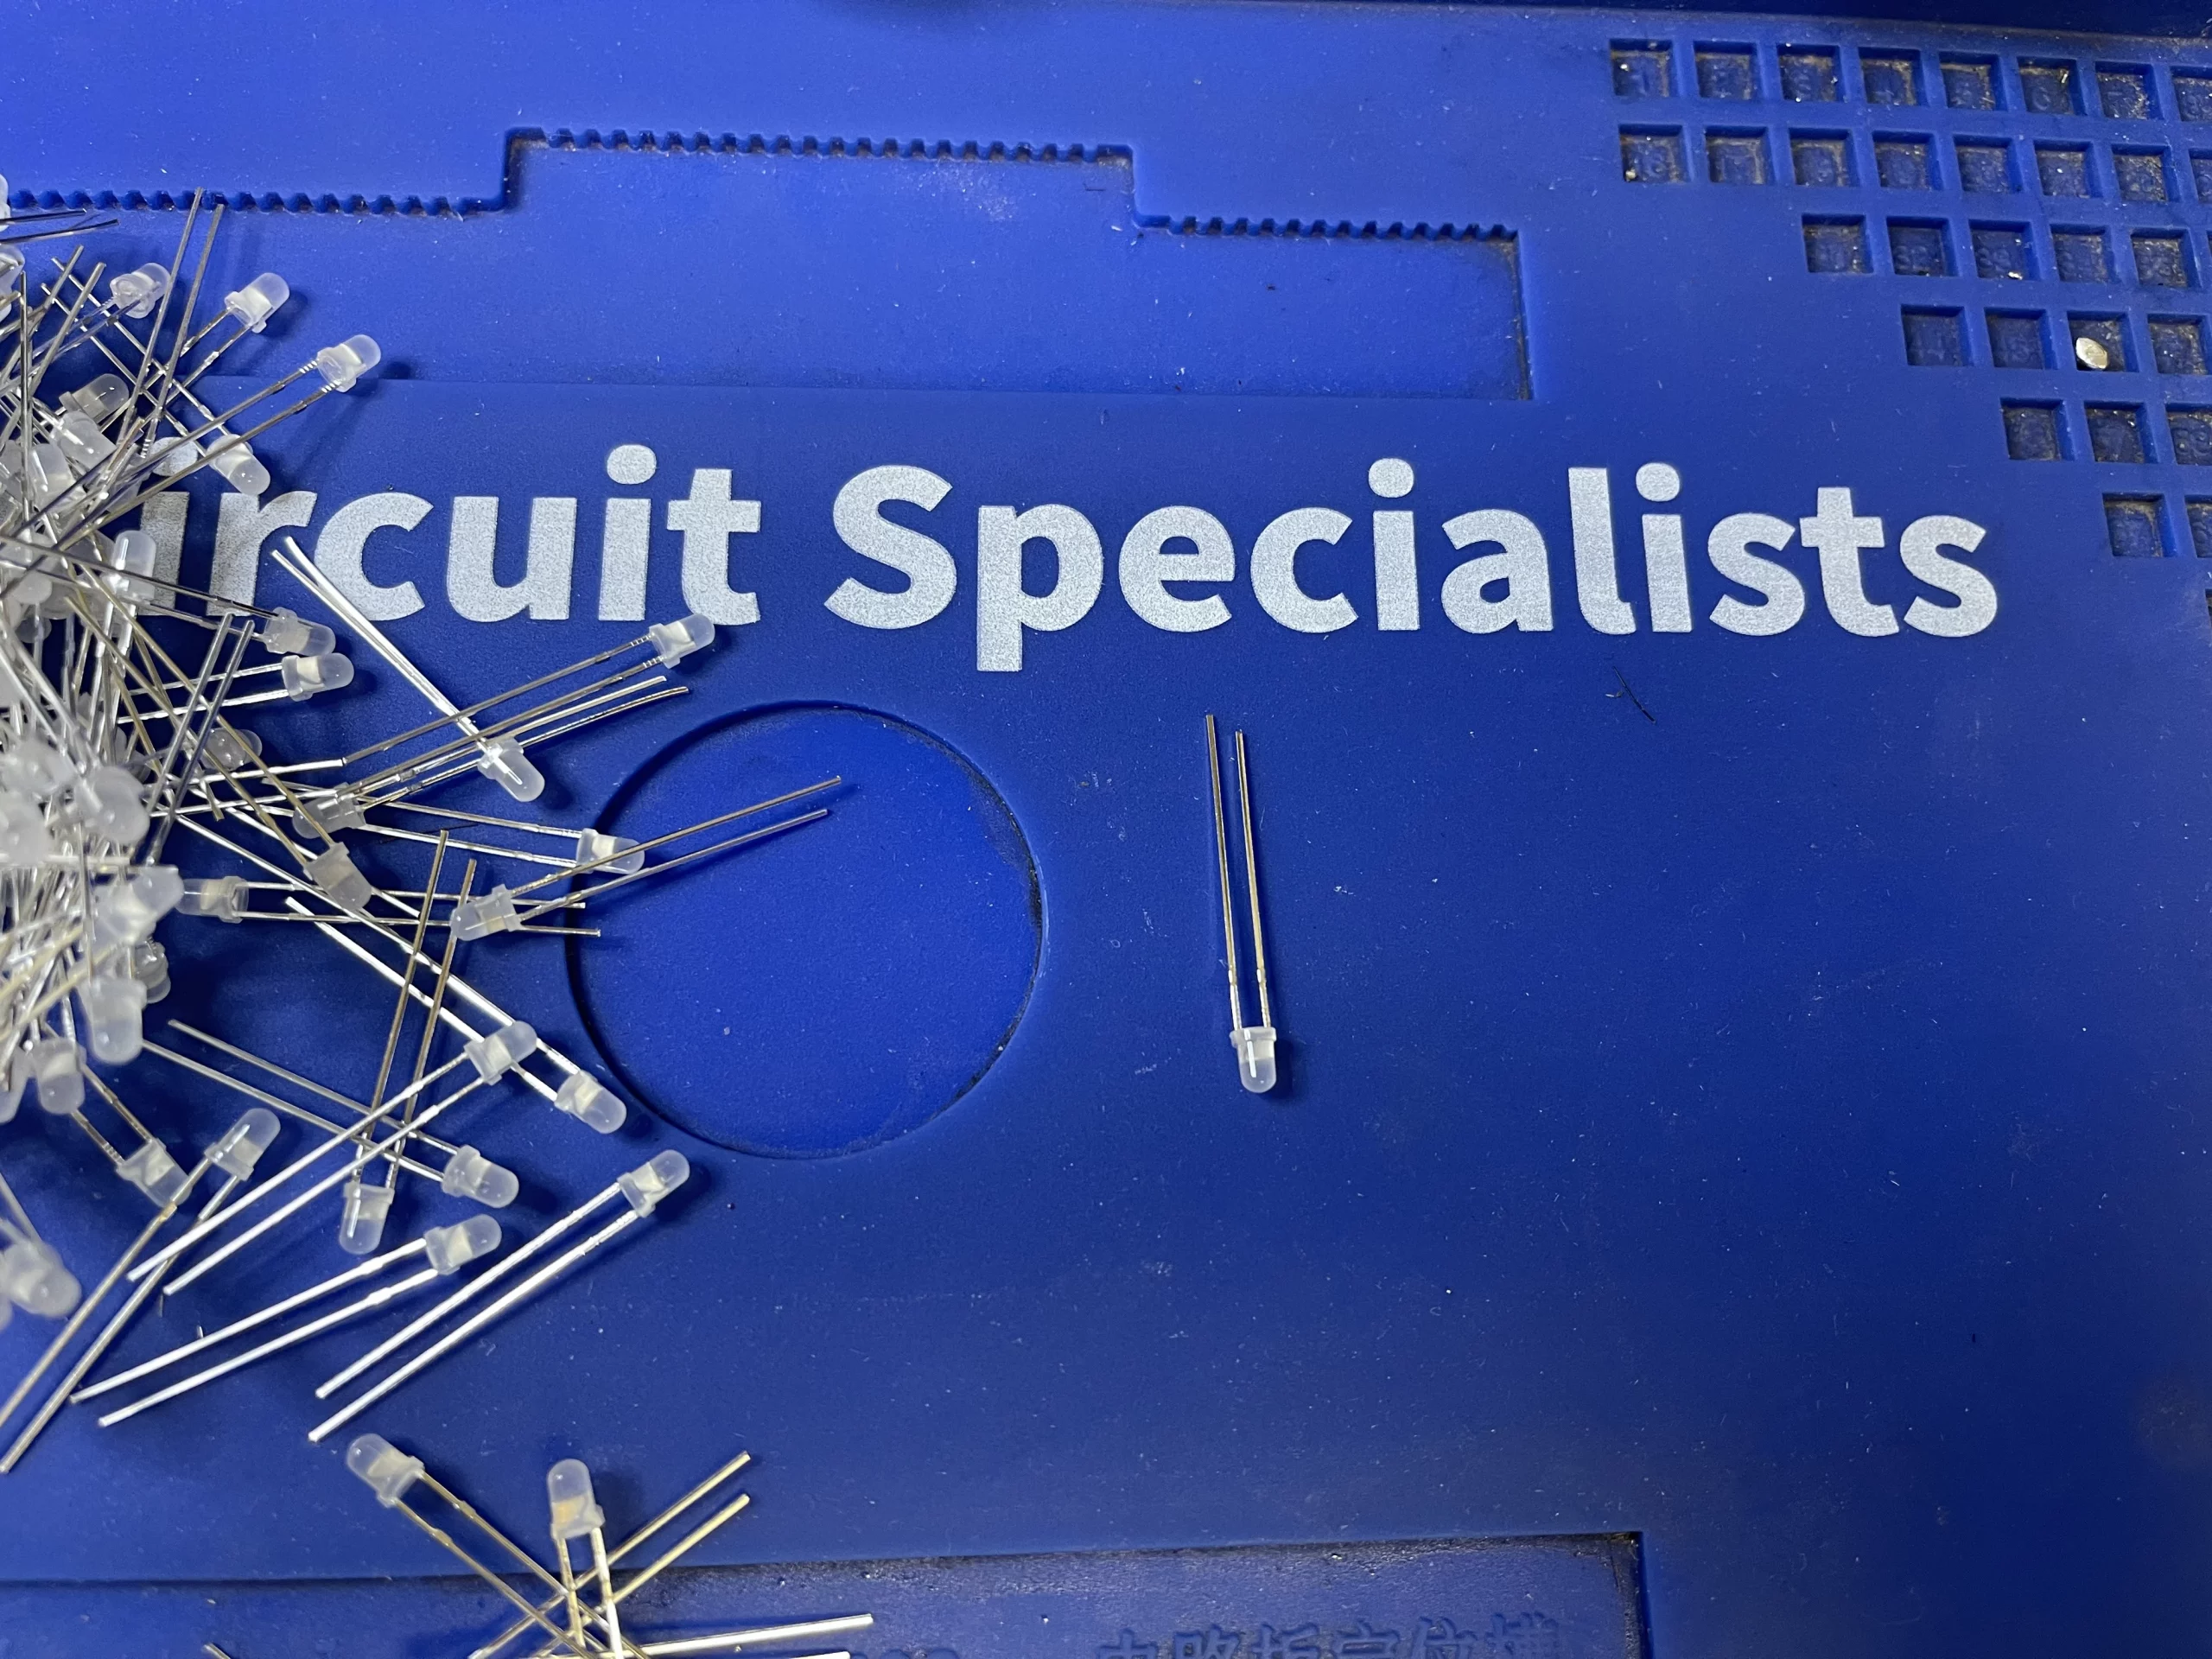
- 155 x 3mm colorful flashing LEDs – the stars of the show!
Soldering Station
A good soldering station is the unsung hero of any soldering project, and this DIY 155 LED Canton Tower is no exception. A reliable, temperature-controlled soldering iron ensures precise and consistent joints, making all the difference between a professional-looking finish and a messy, amateurish one.

With a good soldering station, you’ll enjoy improved accuracy, reduced risk of damage to components, and increased efficiency – essential when tackling a project with 155 solder joints! Look for a station with adjustable temperature control, a comfortable grip, and a durable design to help you power through even the most demanding soldering tasks.
The Canton Tower

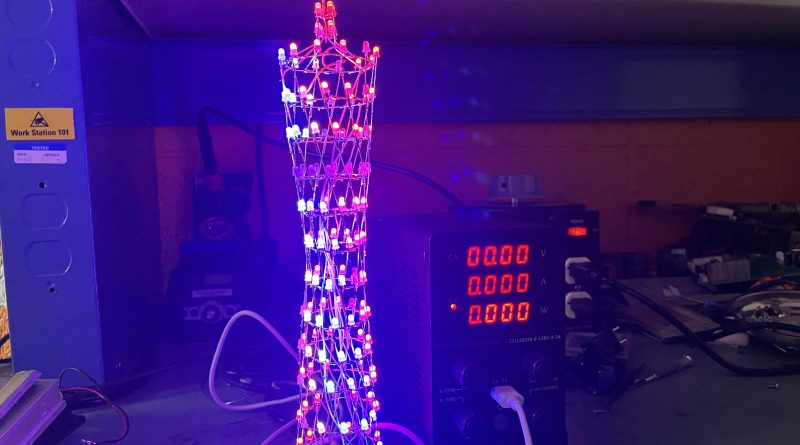
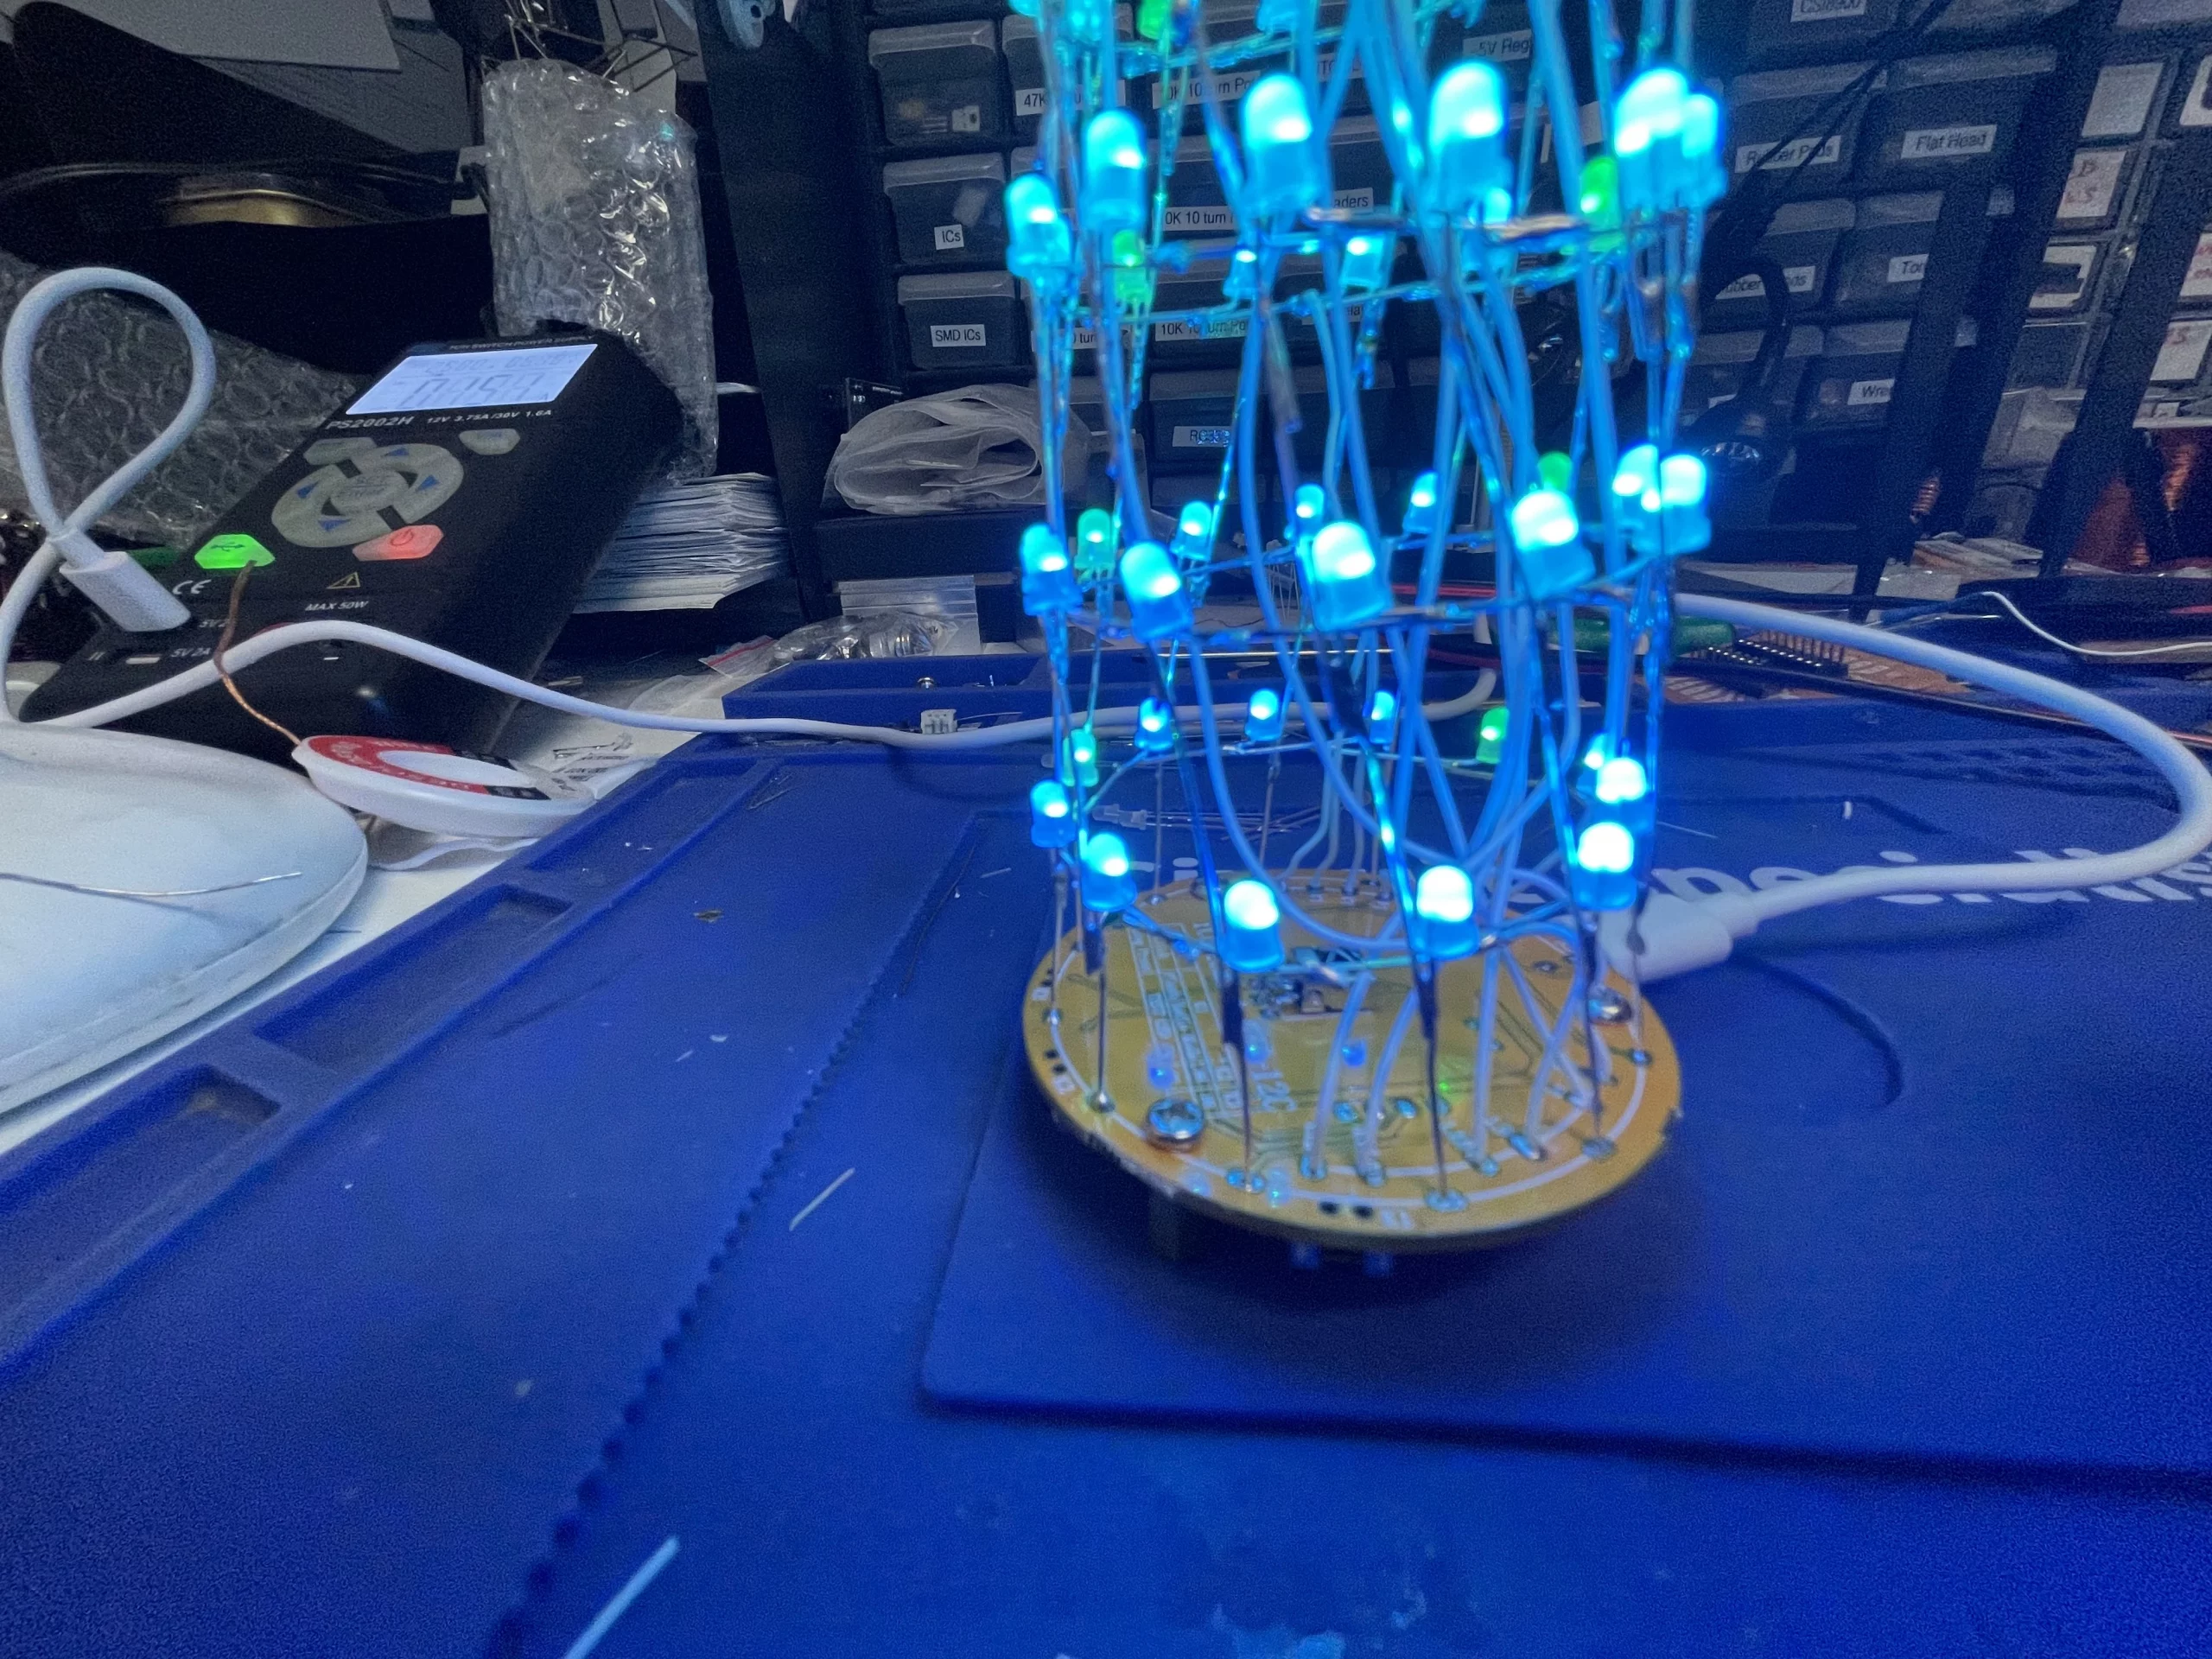
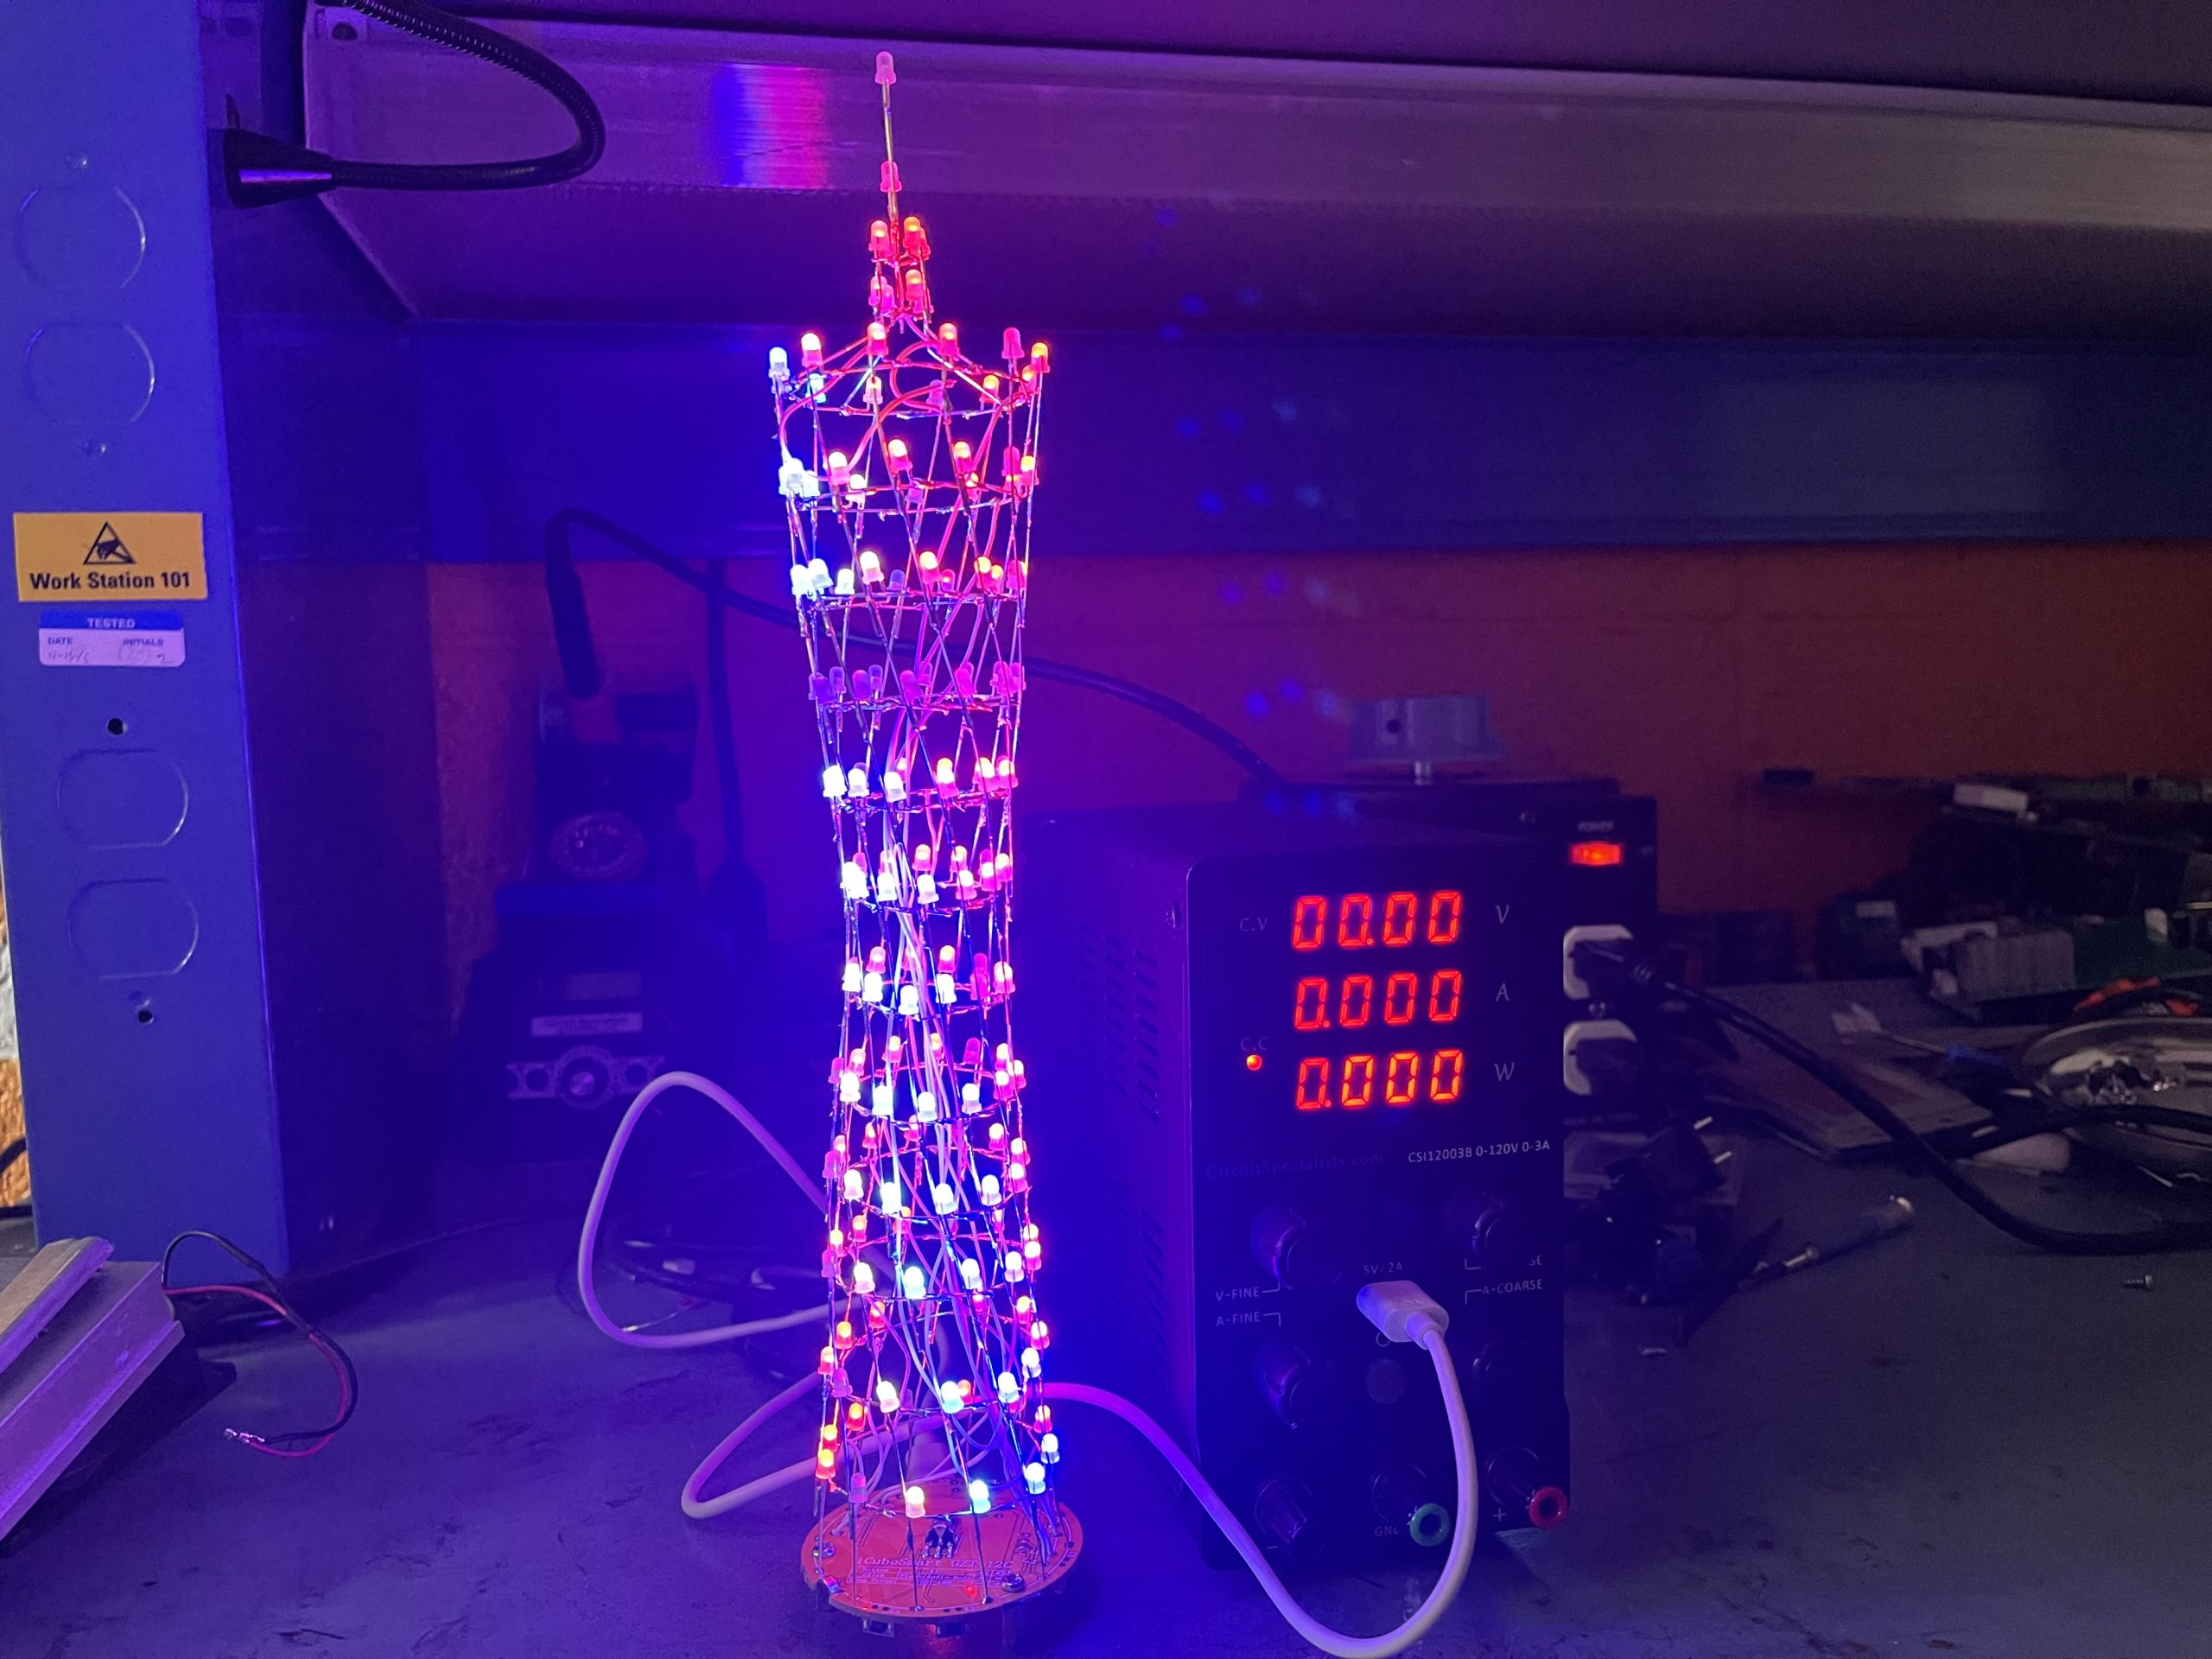
Inspired by the iconic Guangzhou Tower, also known as the Canton Tower, our DIY 155 LED Canton Tower project pays homage to this architectural marvel. Completed in 2010, the original Canton Tower stands 610 meters tall, its twisted, tapered shape becoming an instant symbol of Guangzhou, China. Our miniature tribute captures the essence of this design, with 12 LED rings carefully stacked to form a twisted, conical shape. As the 155 colorful LEDs illuminate, the tower comes alive, showcasing a dazzling display of light and geometry. Follow our guide to build your own mesmerizing DIY 155 LED Canton Tower, and experience the beauty of this unique design in a whole new way!
Step-by-step instruction
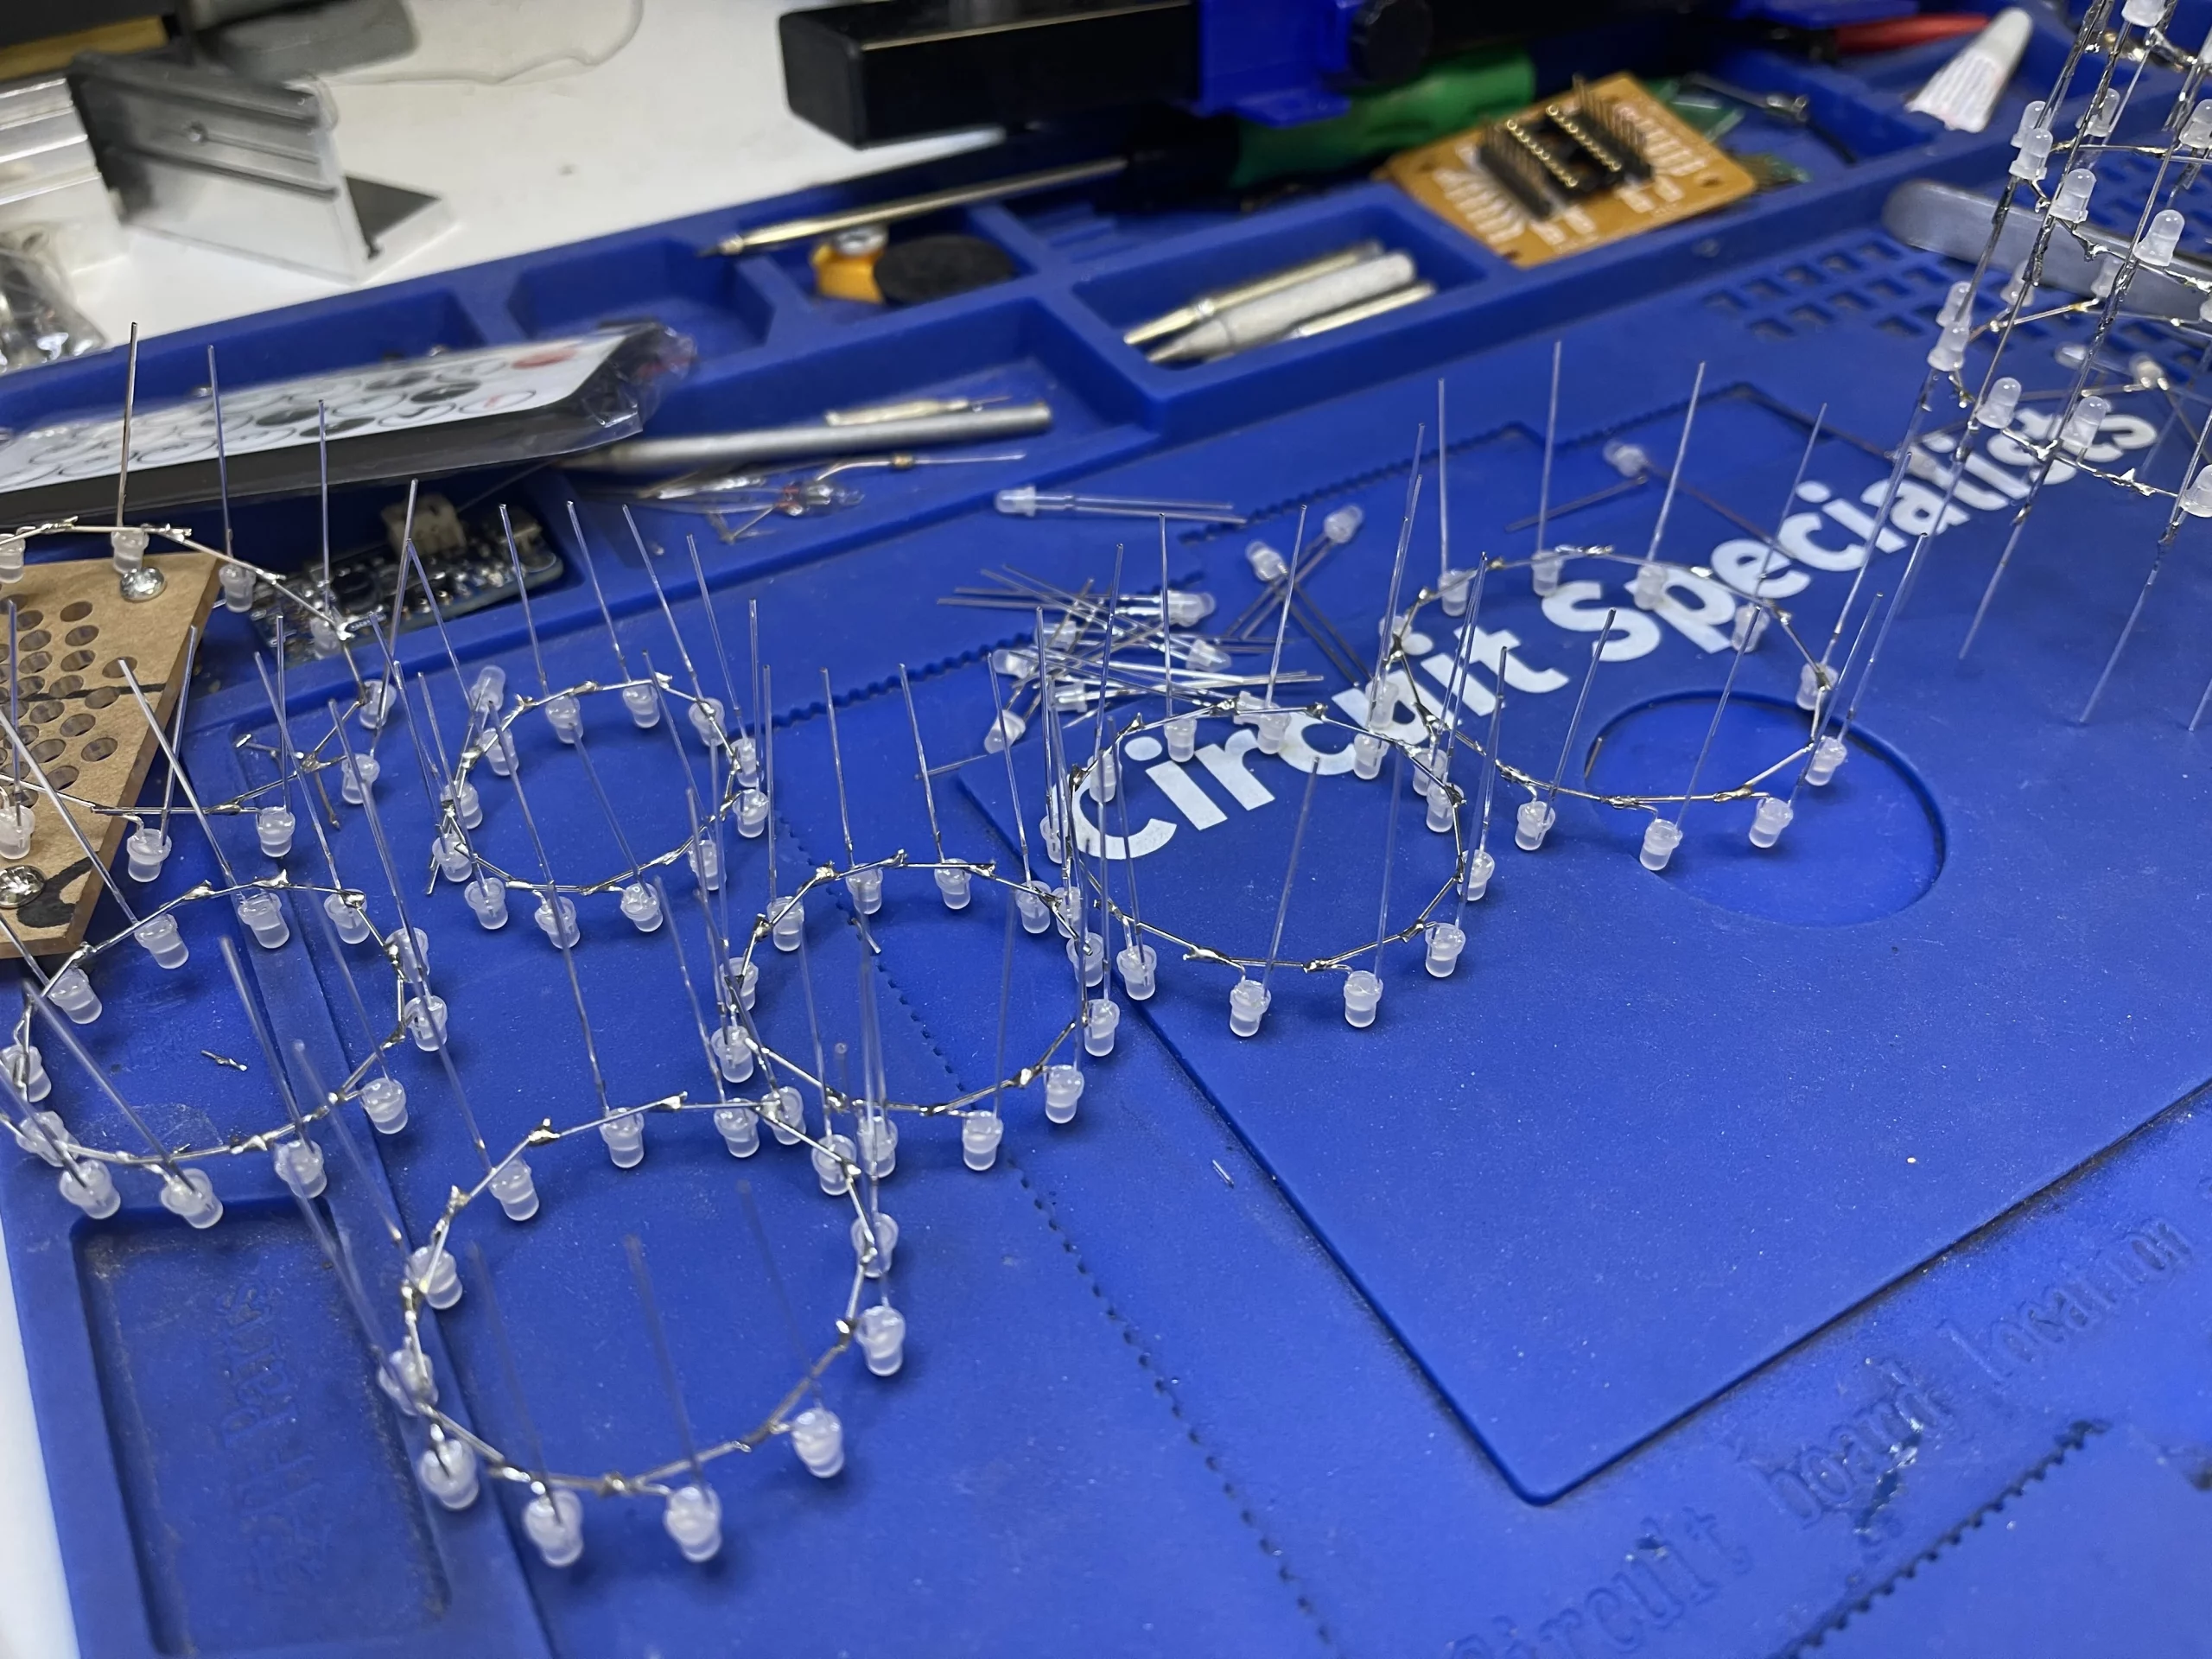
First, let’s make the ring using the acrylic template, make sure to bend the negative leg down and make a 90-degree angle to the positive leg on the LED.
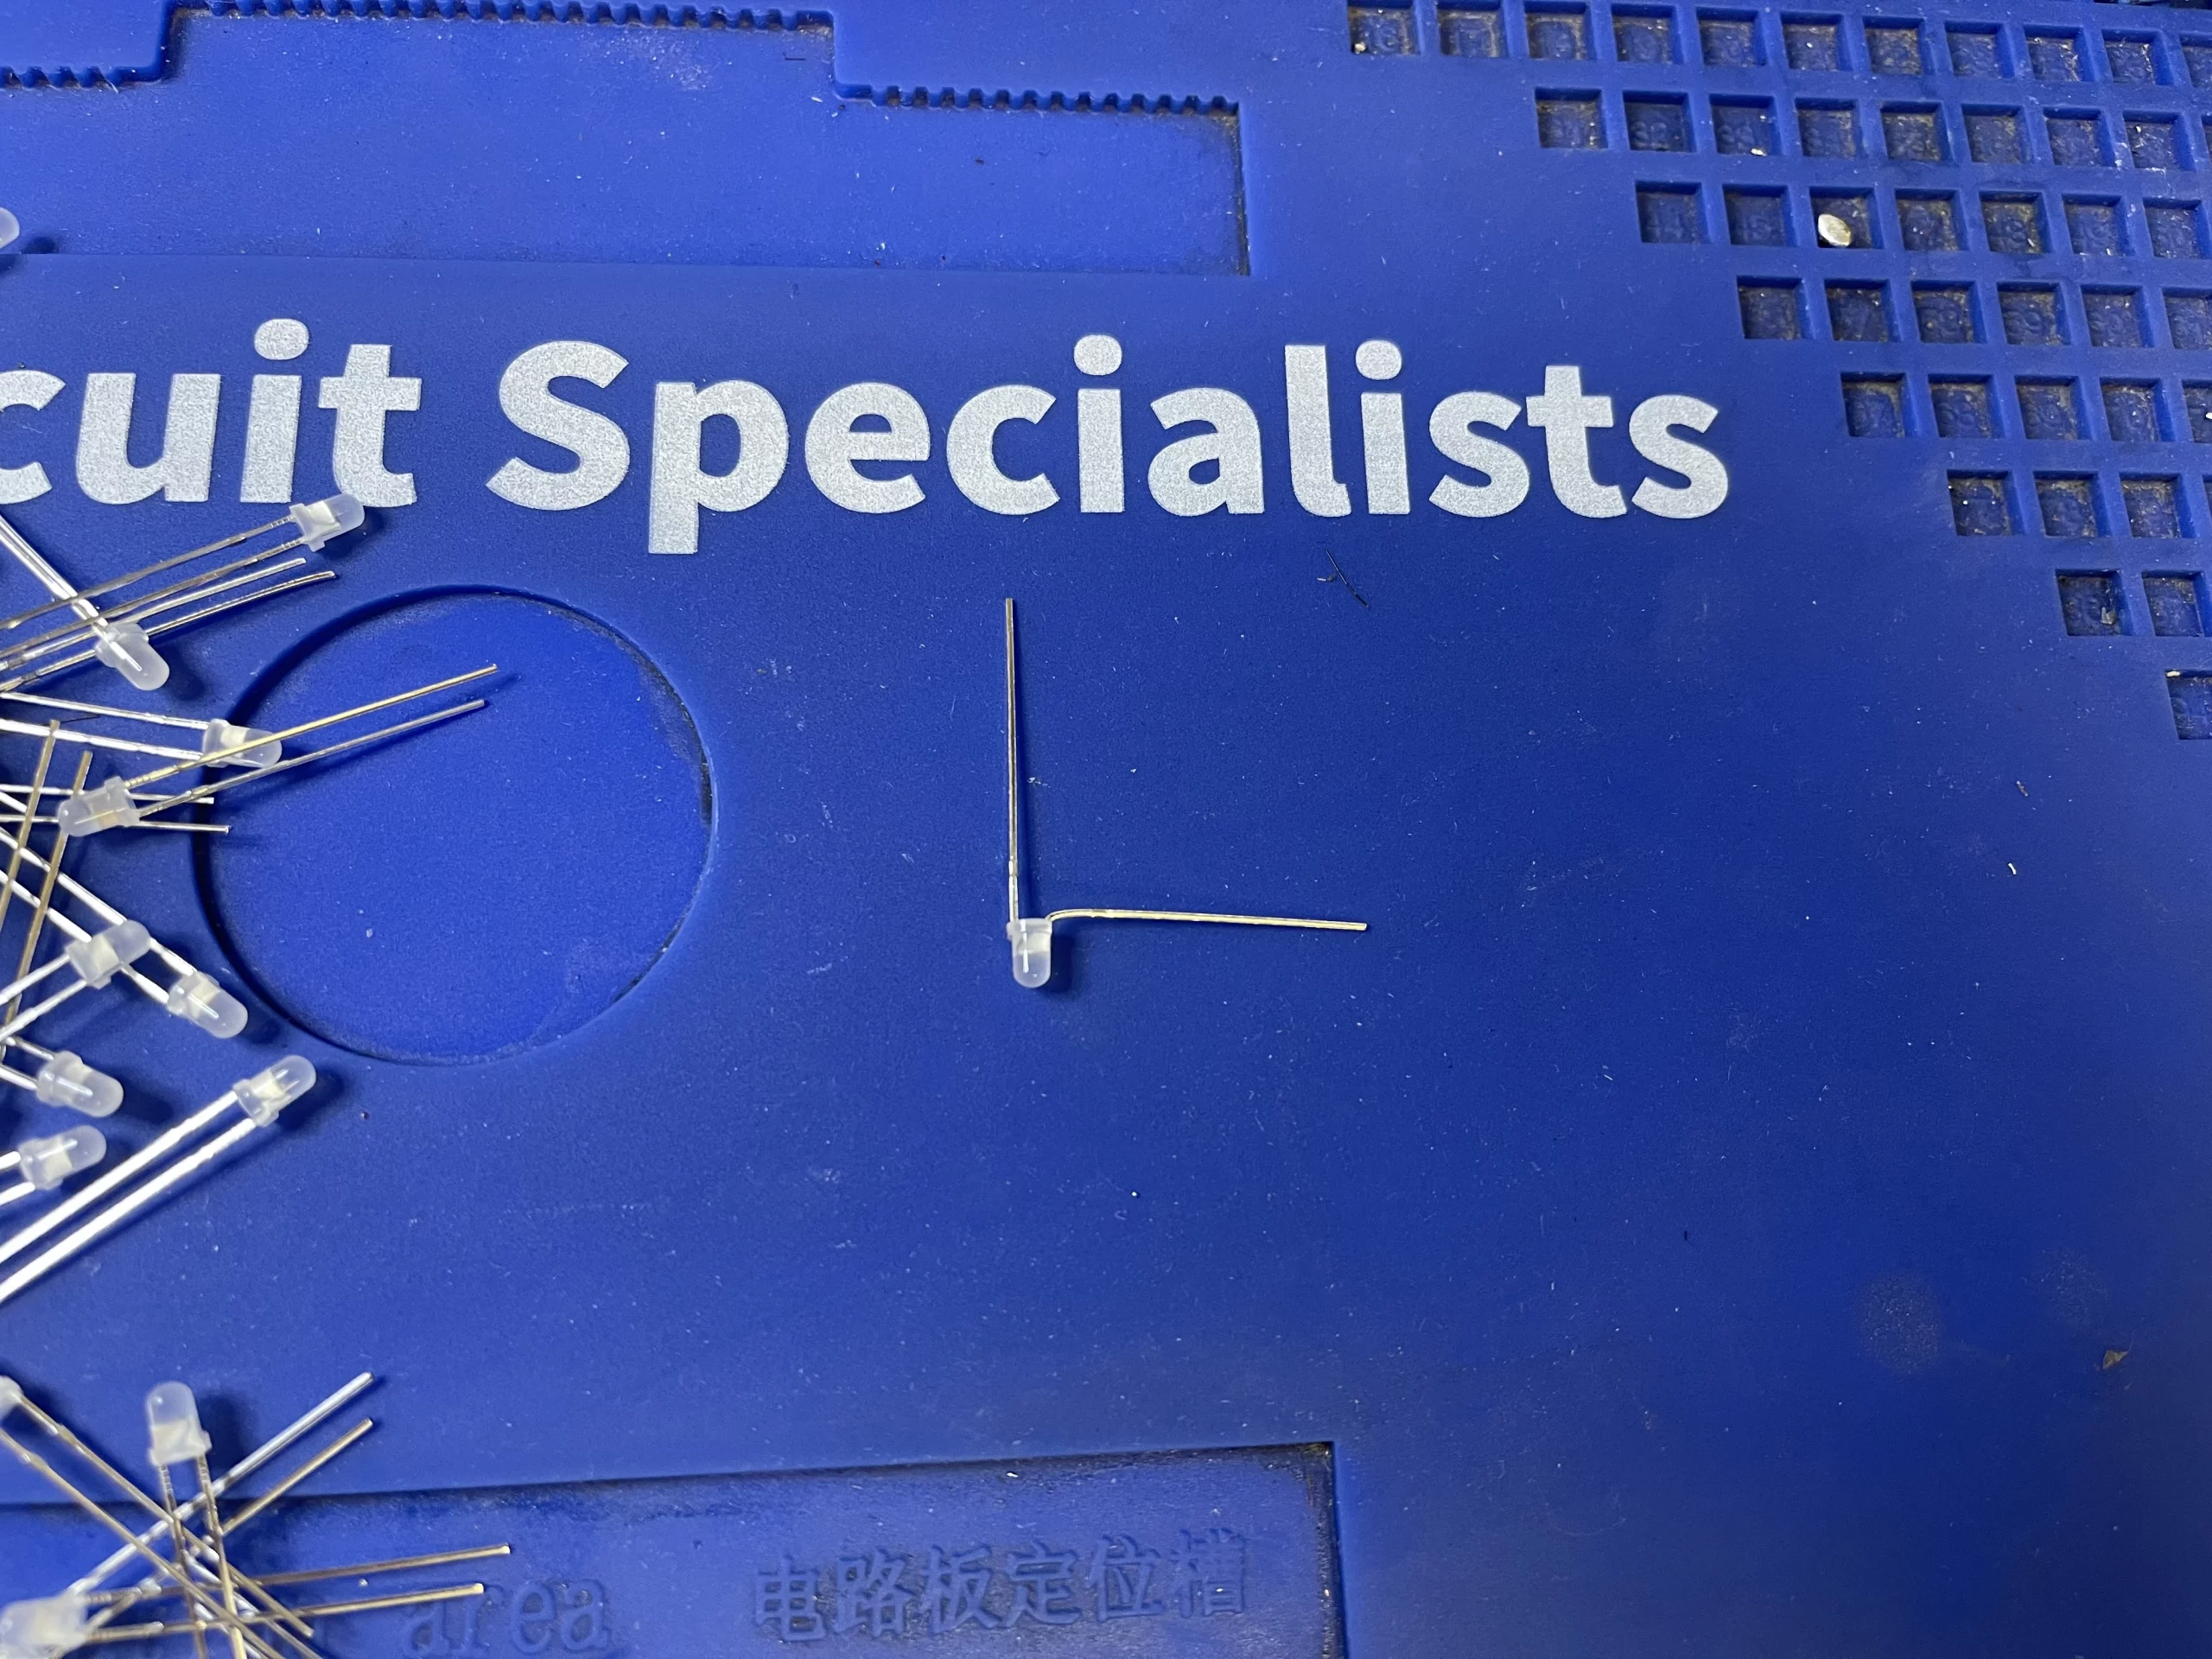
Make sure the electrode leg is bent and touches the next LED negative electrode before soldering them together.
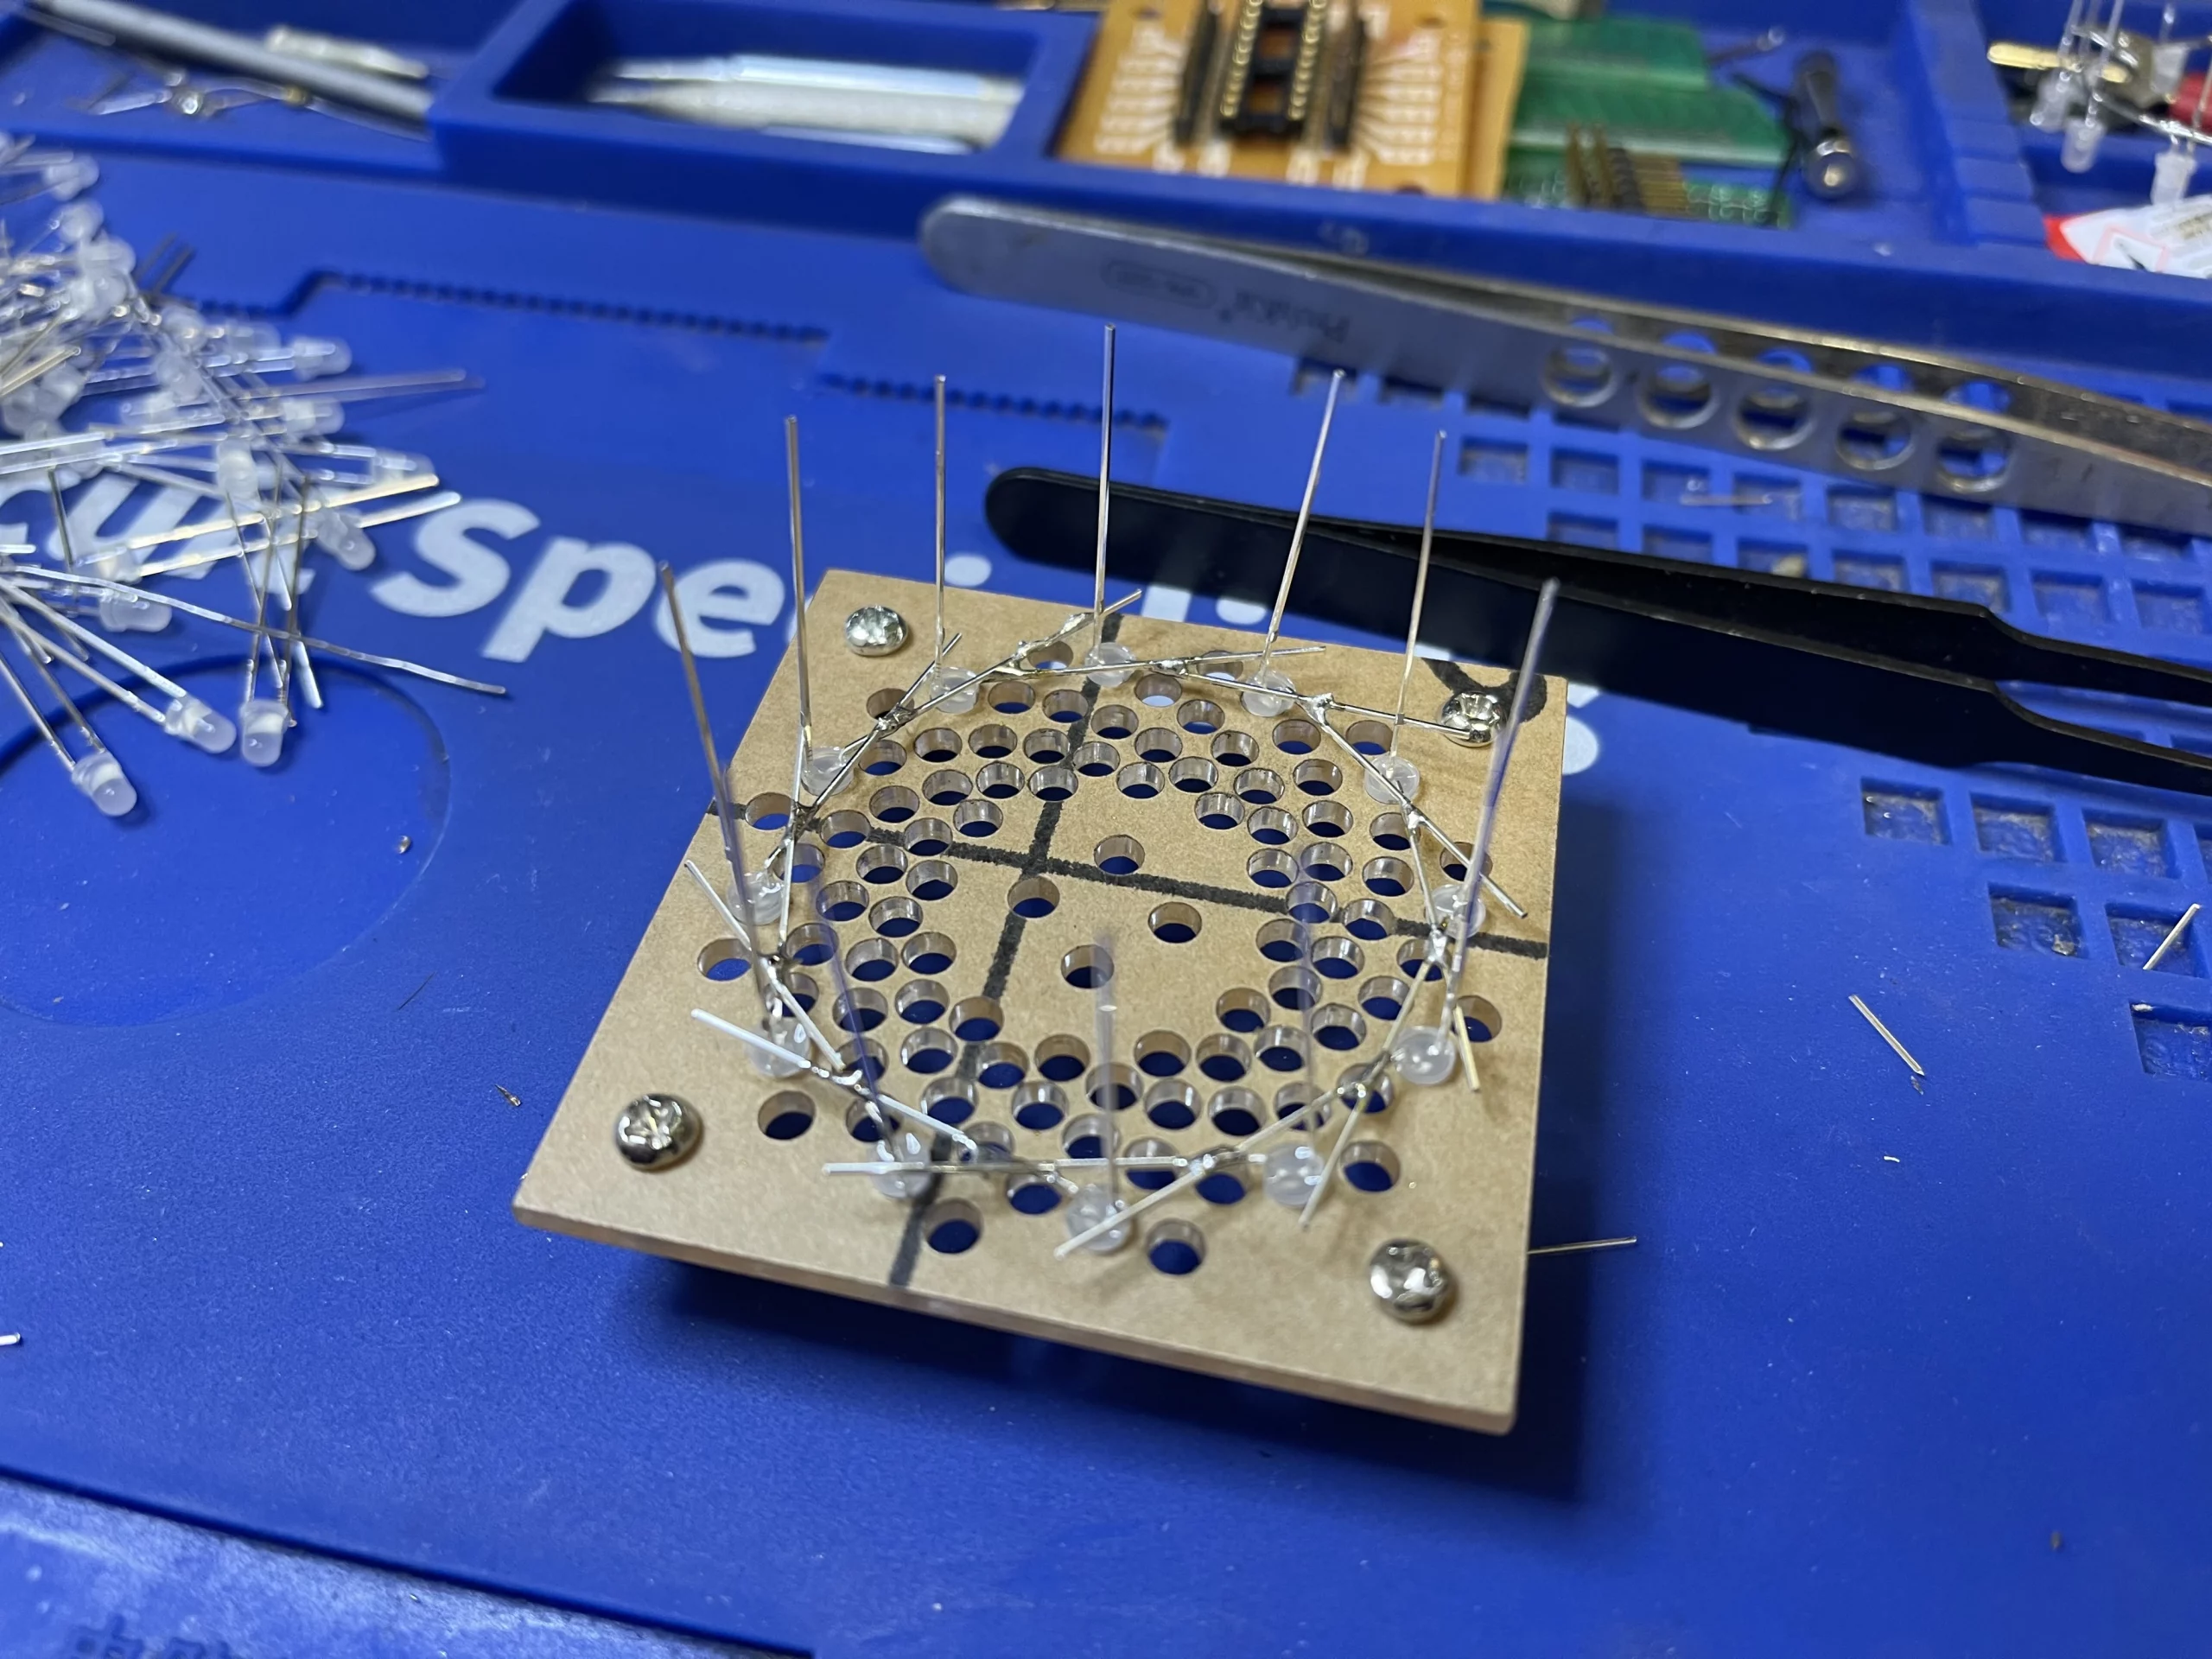
Note: be careful not to solder the bent negative electrode to the vertical positive electrode.
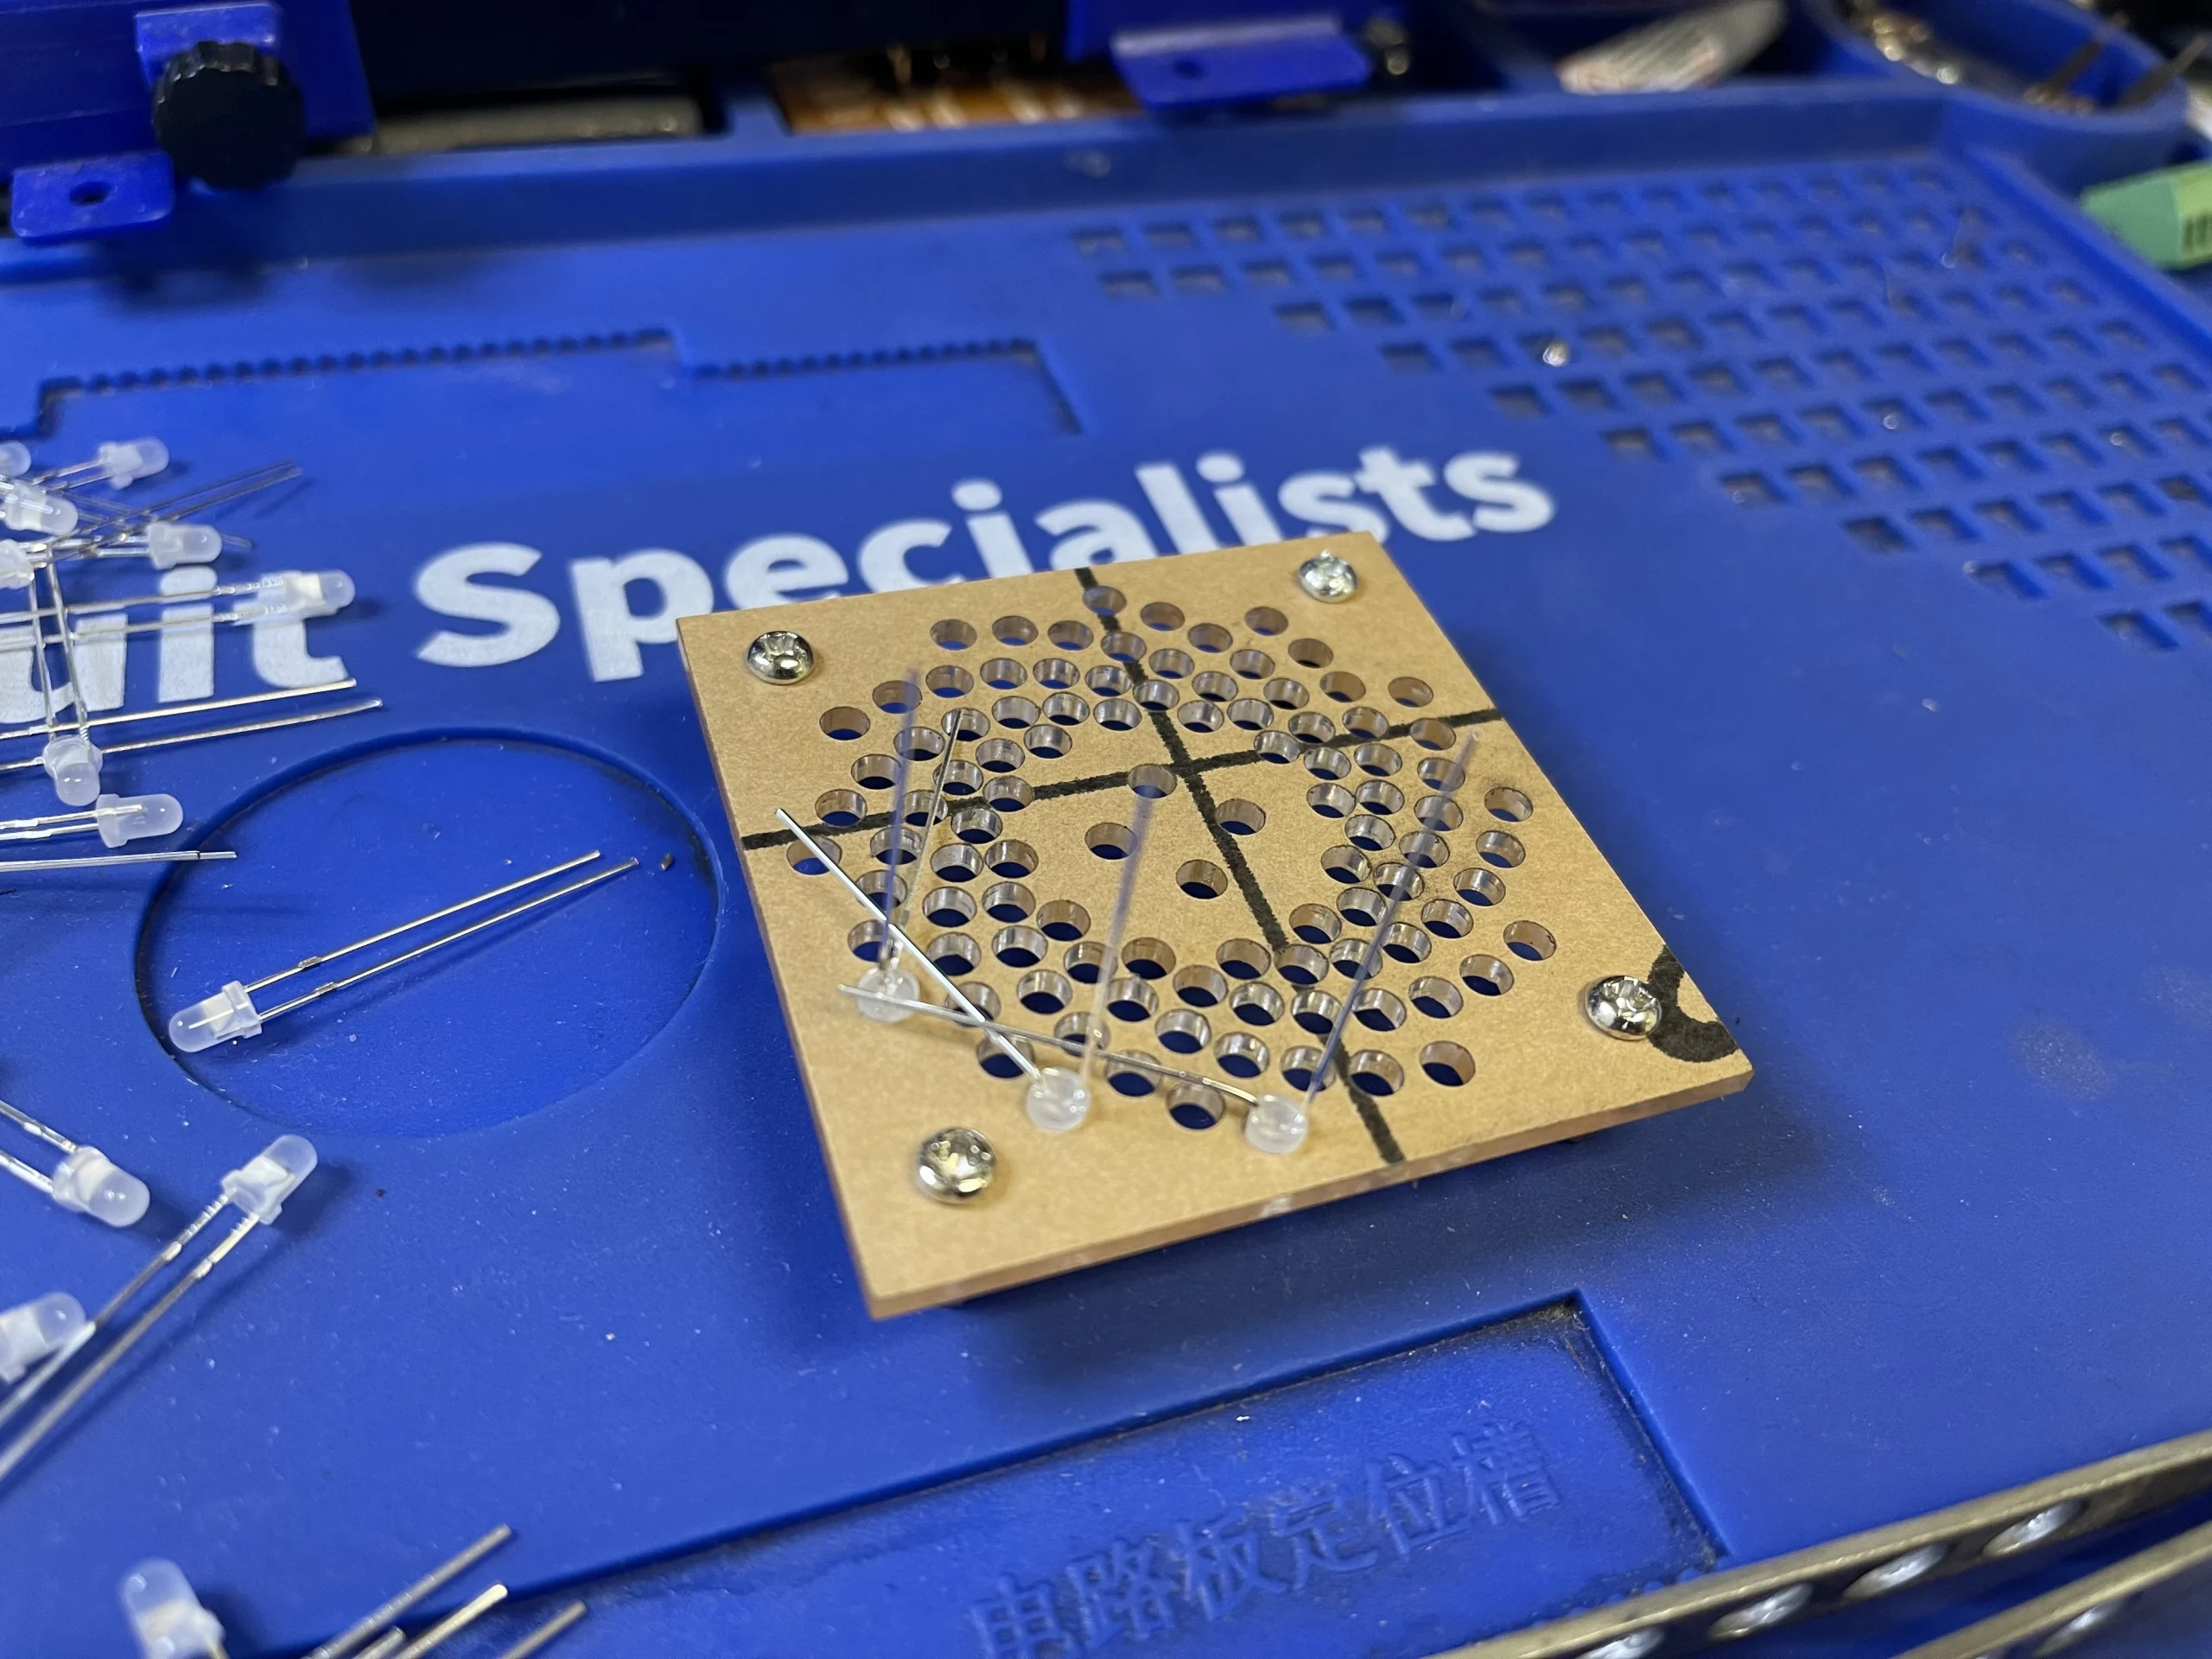
By following the pattern on the acrylic template, you should be able to make the second ring for the project.
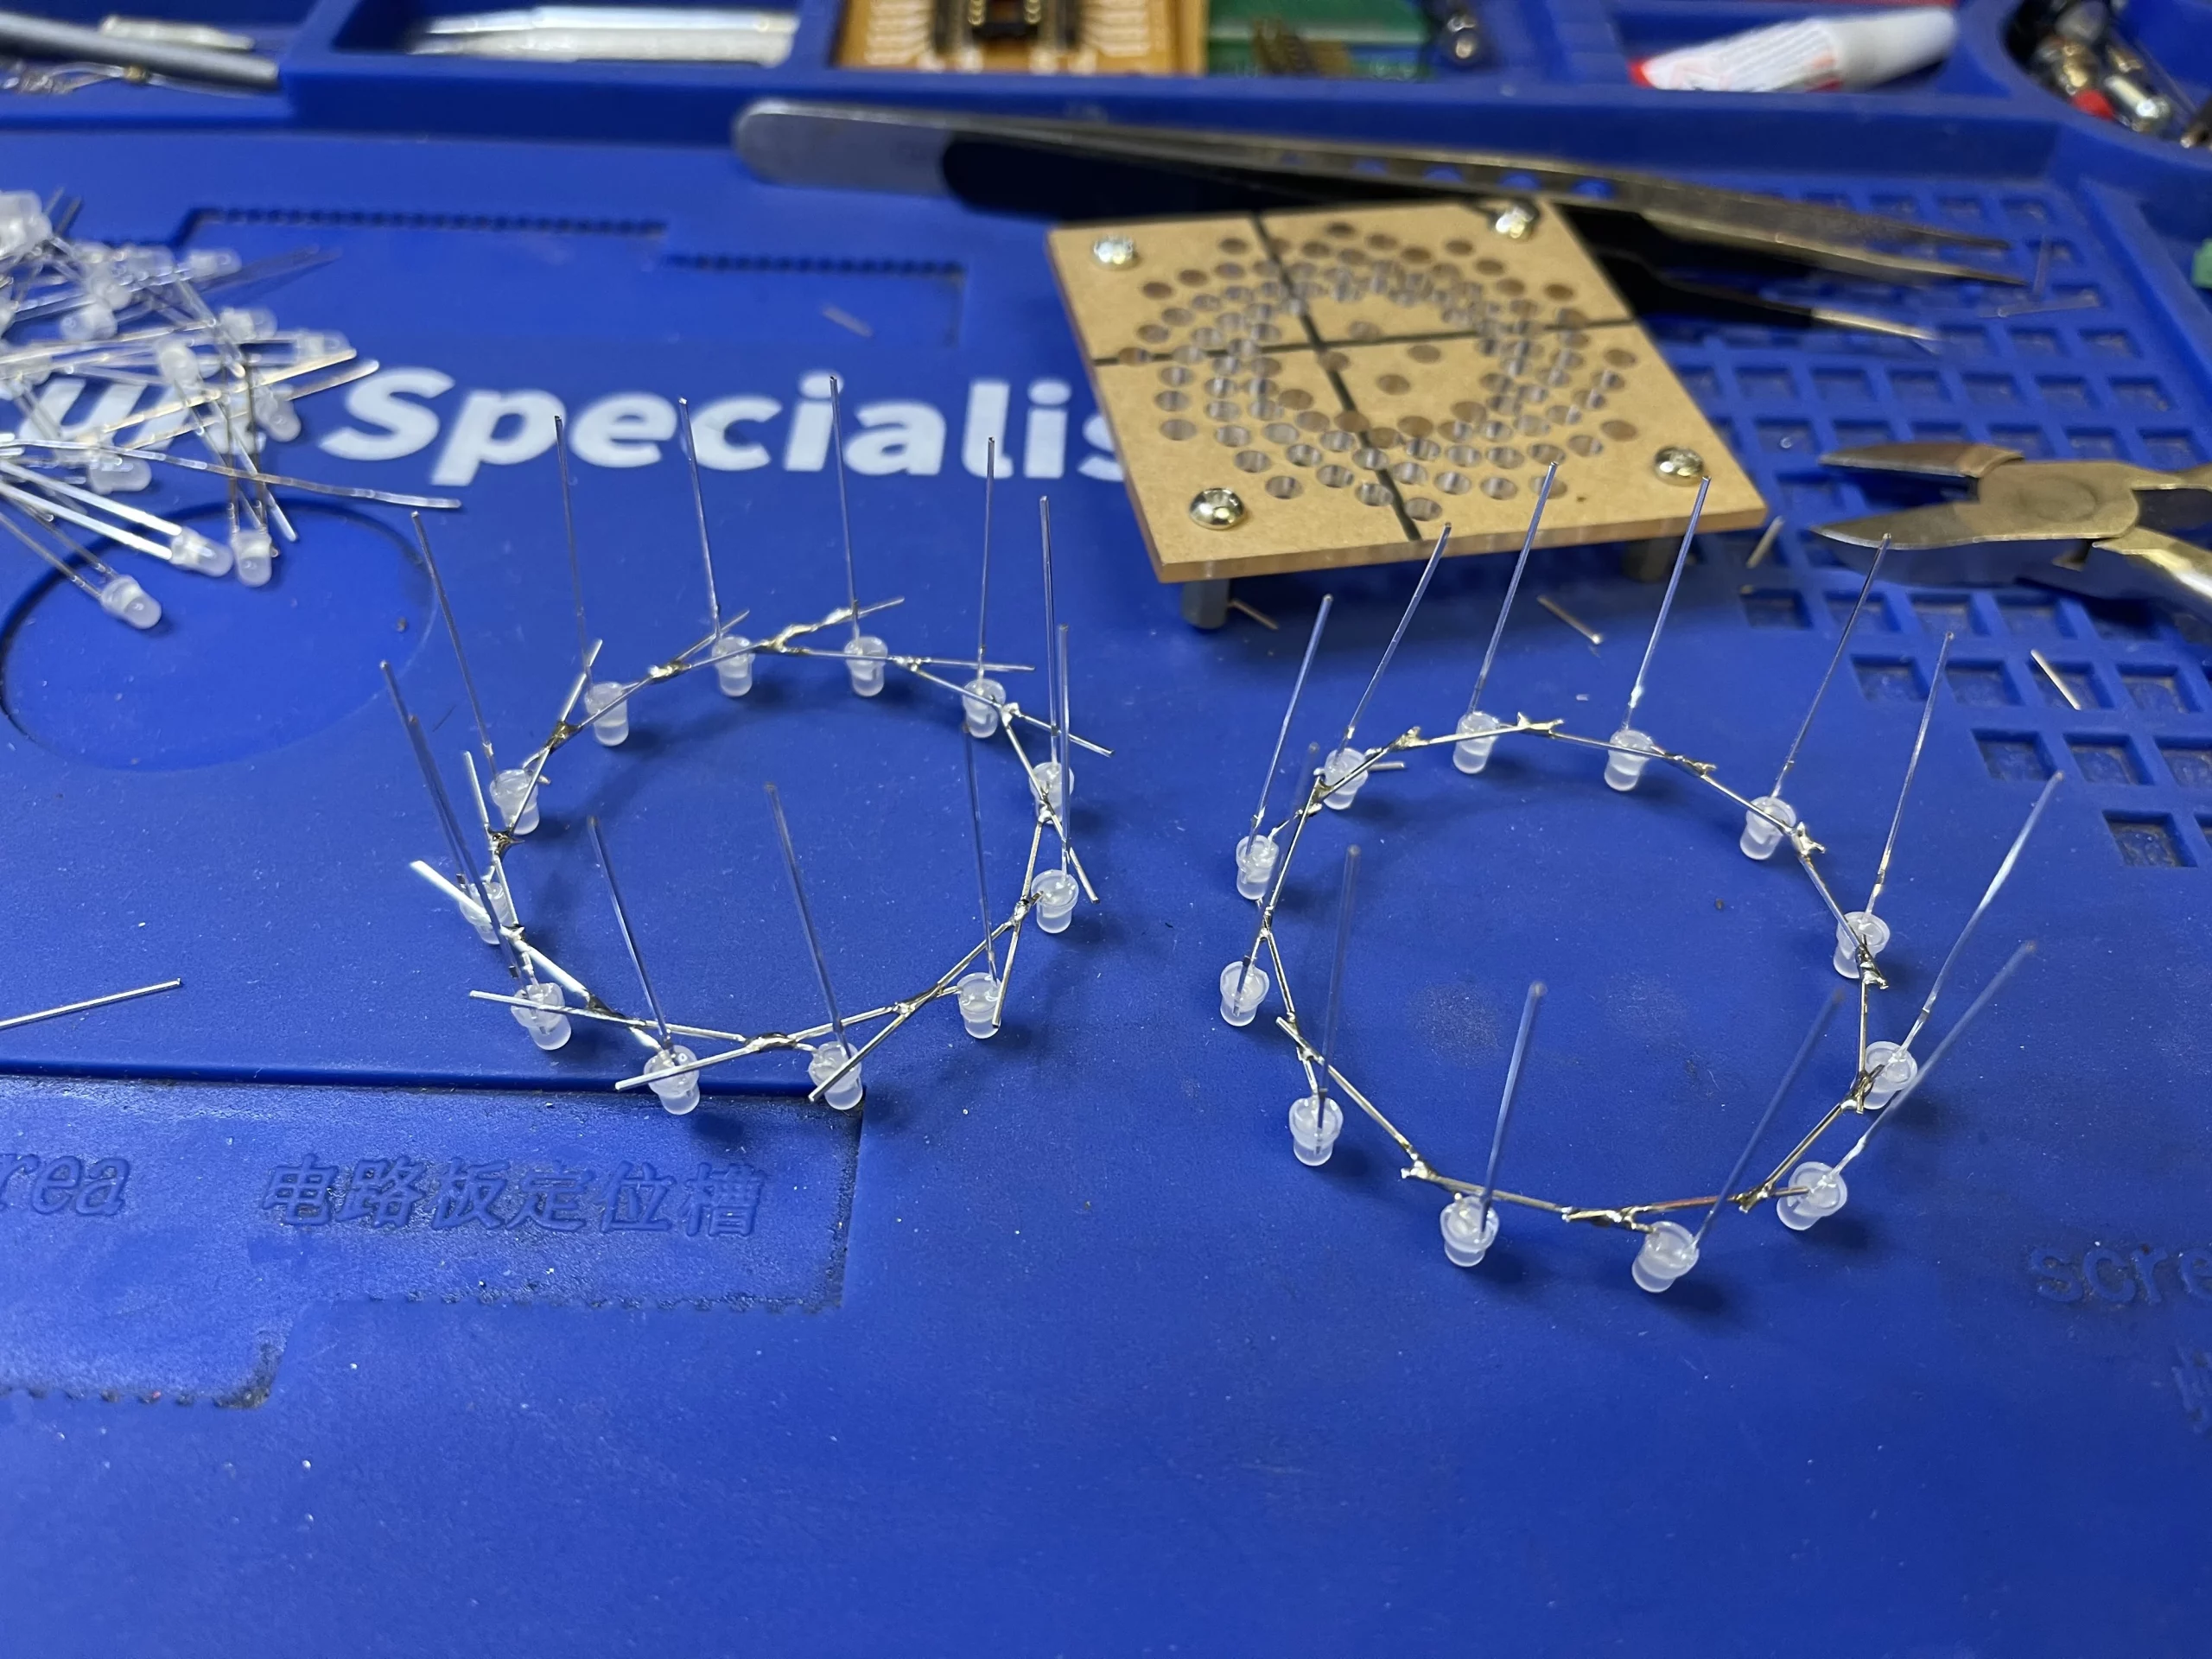
In addition, test the LED rings as you made them to make sure to test each LED ring to make sure it works before soldering them all together.

Once finish making the first six rings, we can solder them together from the smallest ring from the top.
Now, we need to repeat the process and make another 6 LED rings for the rest of the tower.
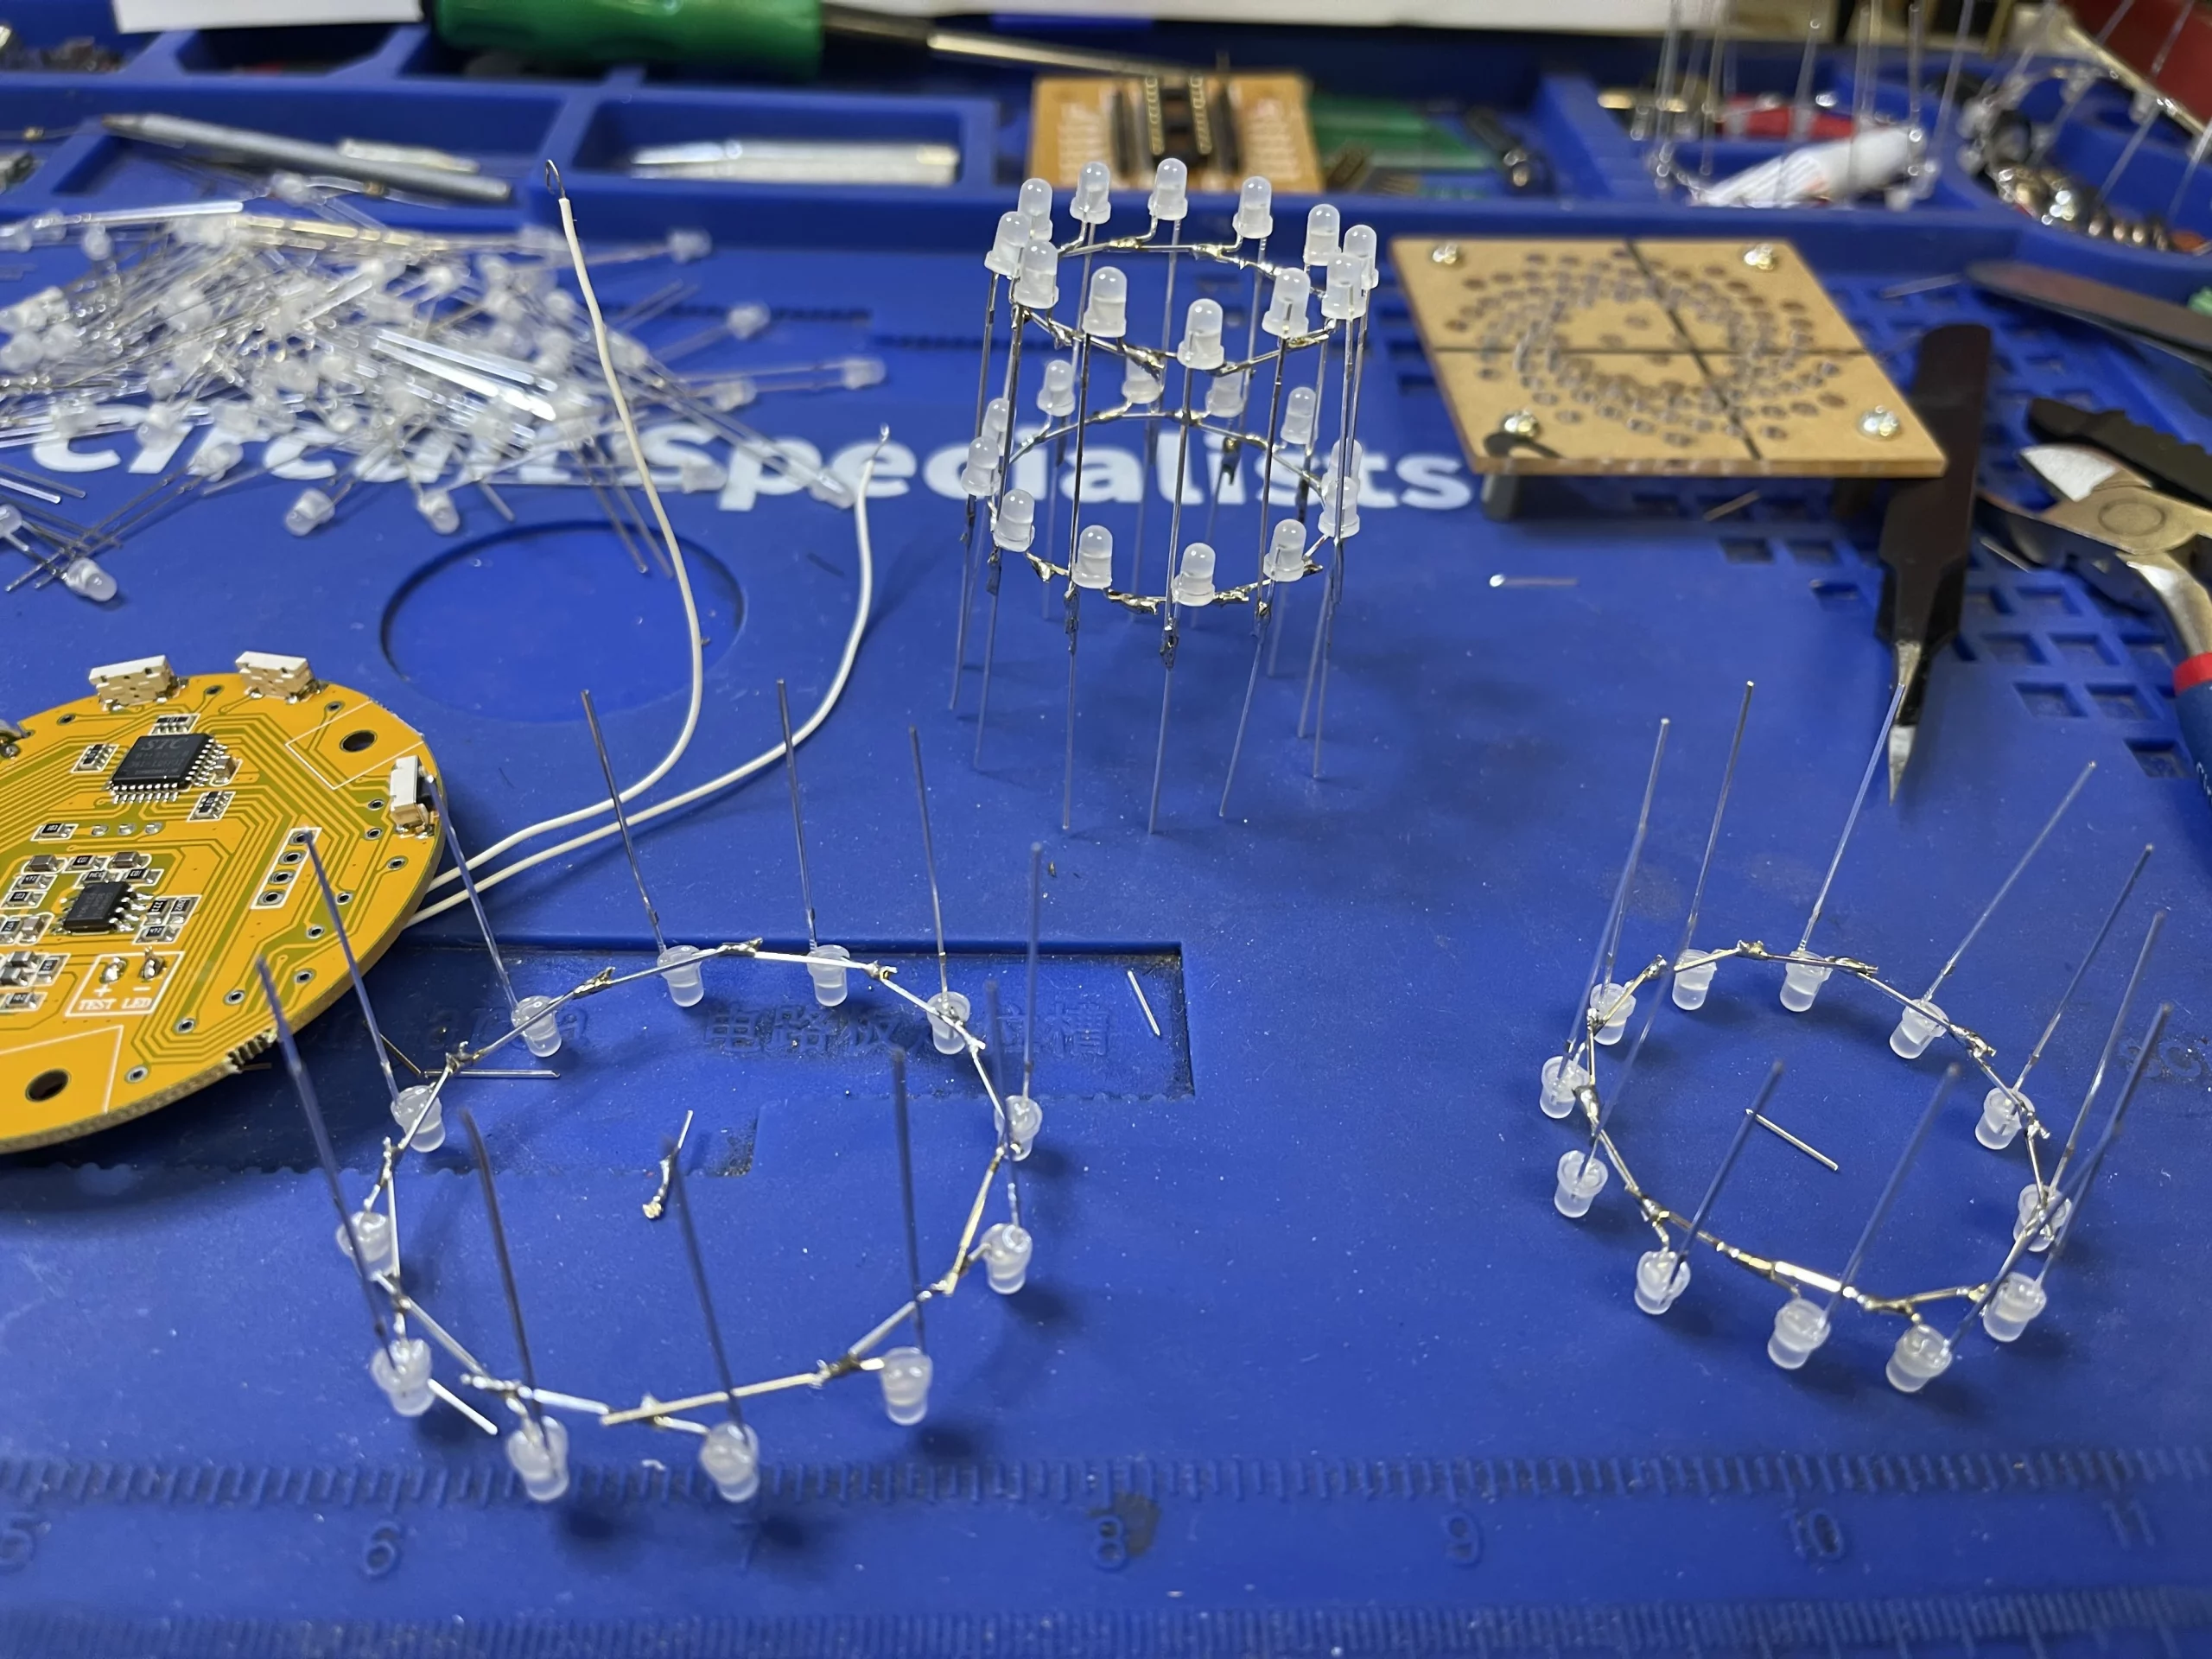
Then, soldering the rest of the ring onto the LED tower from the smallest ring to the largest ring. Make sure to test the LED ring by soldering them together.
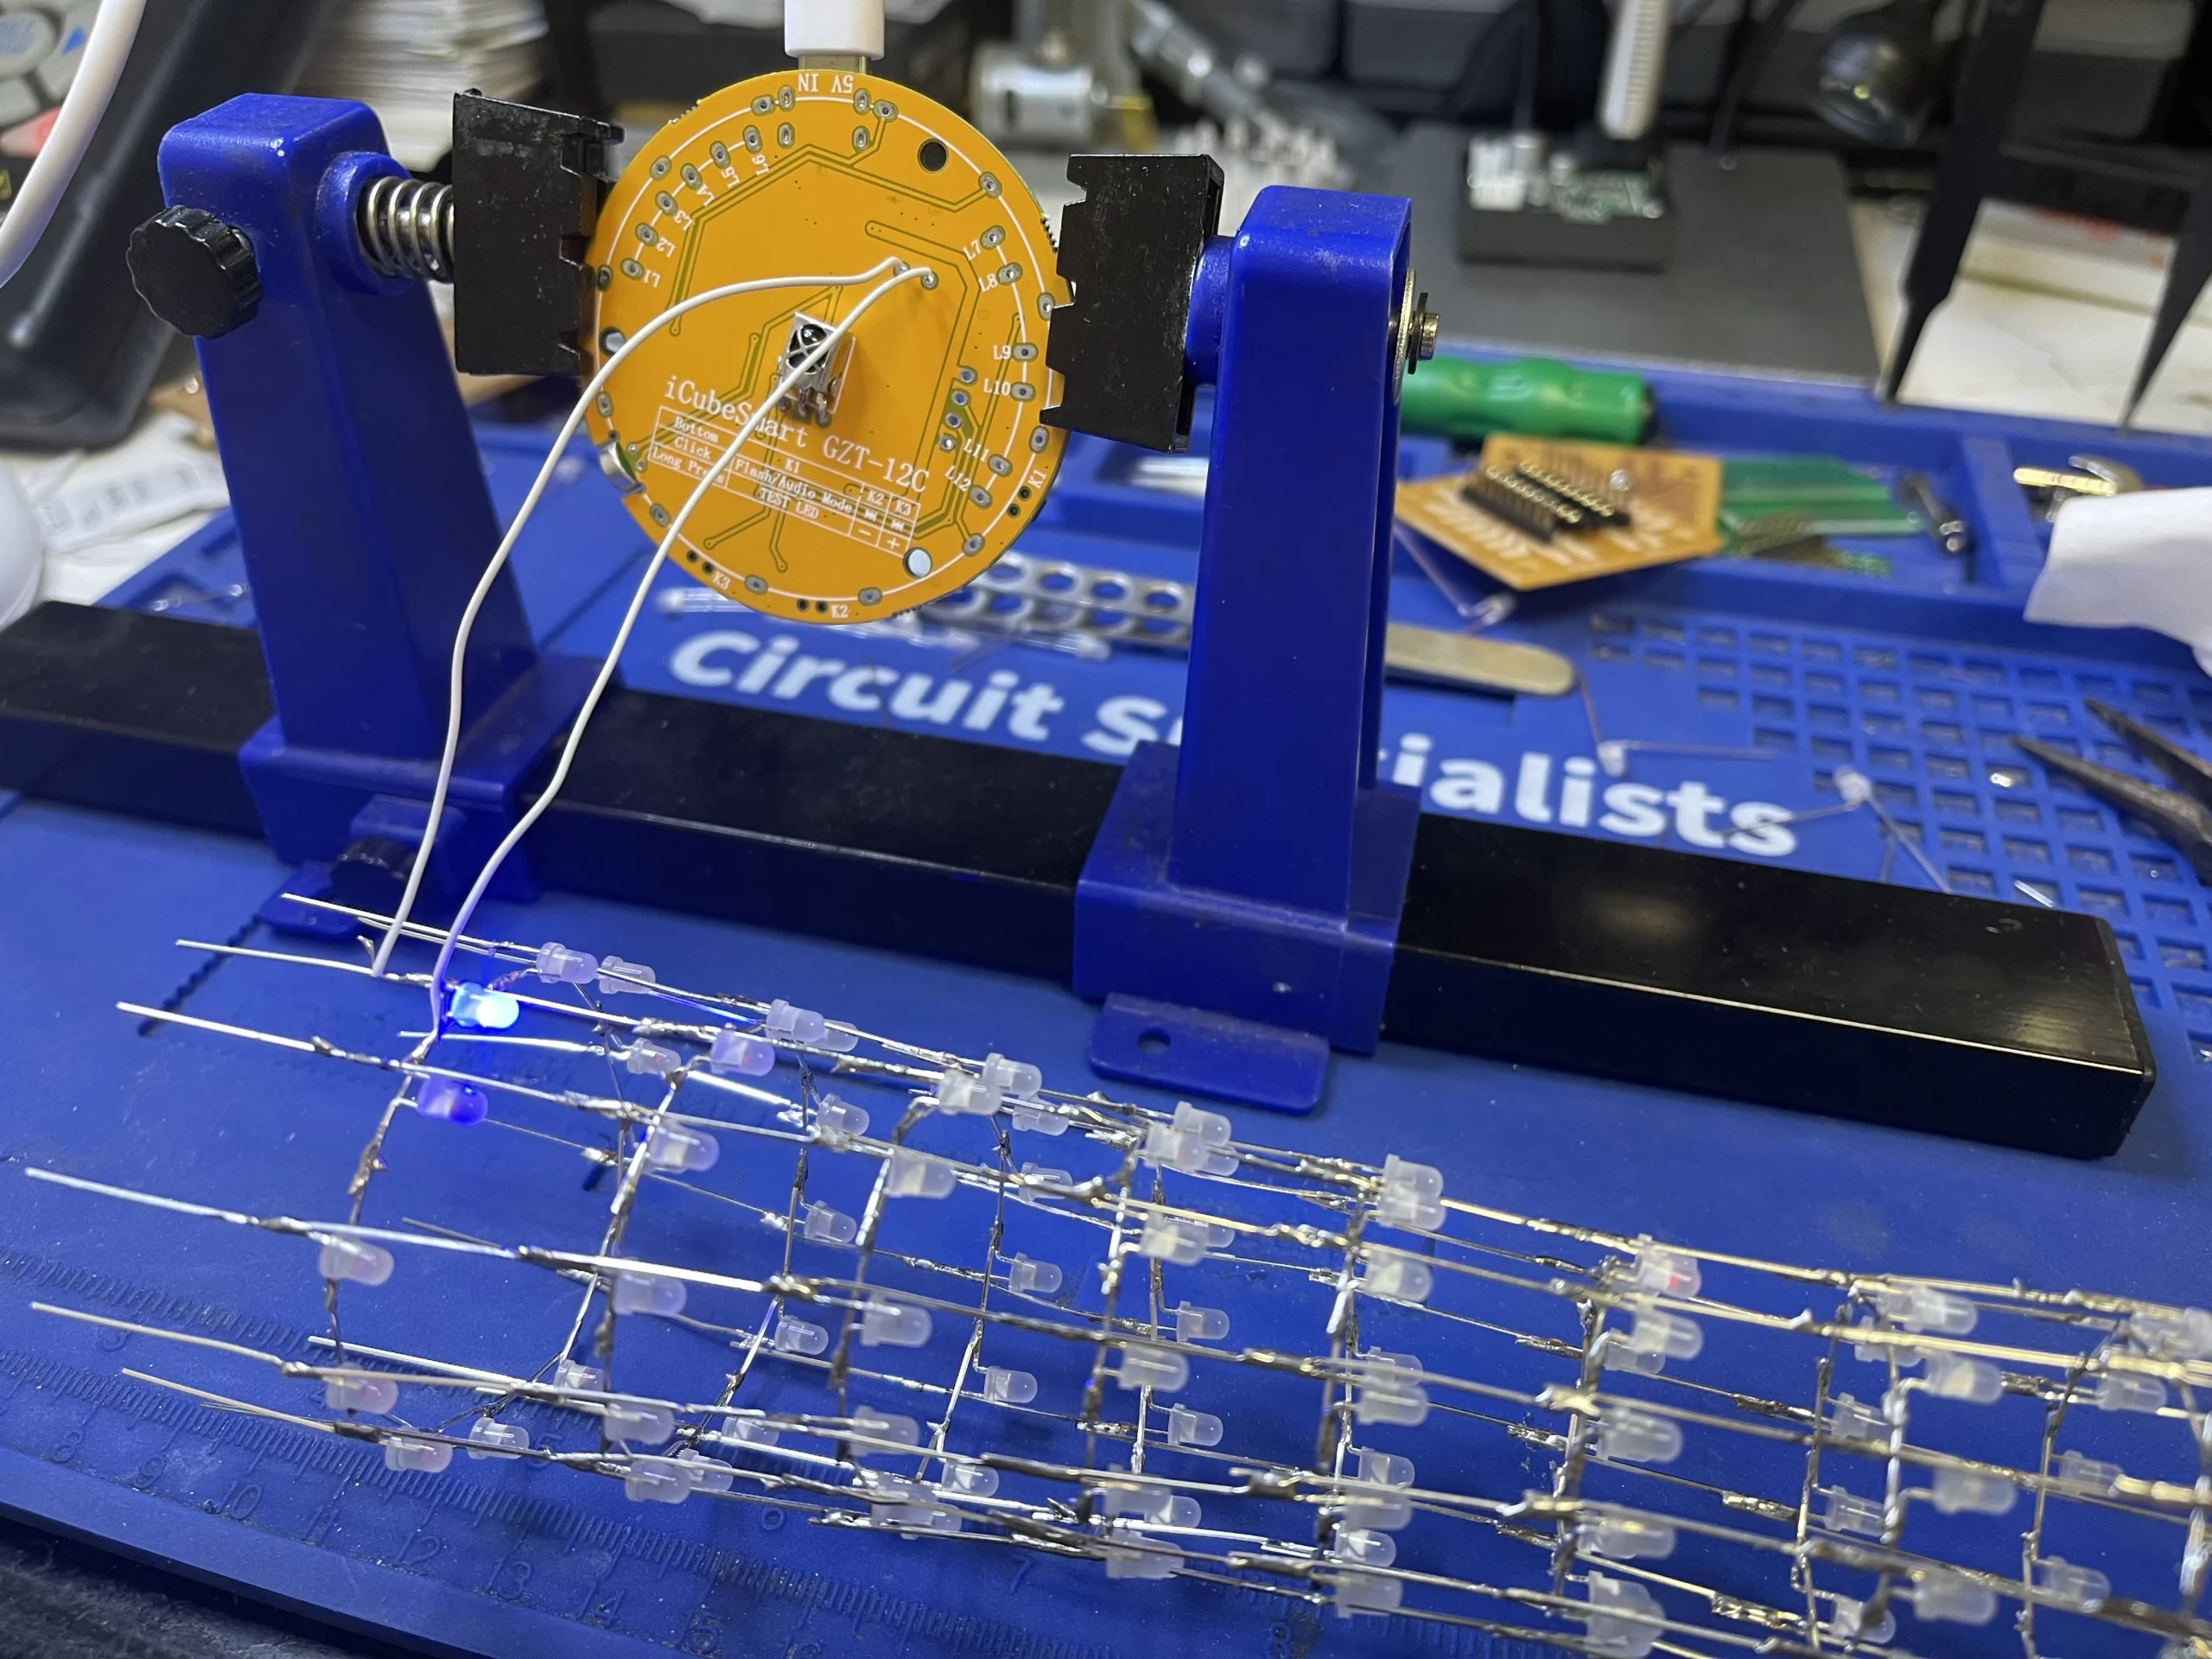
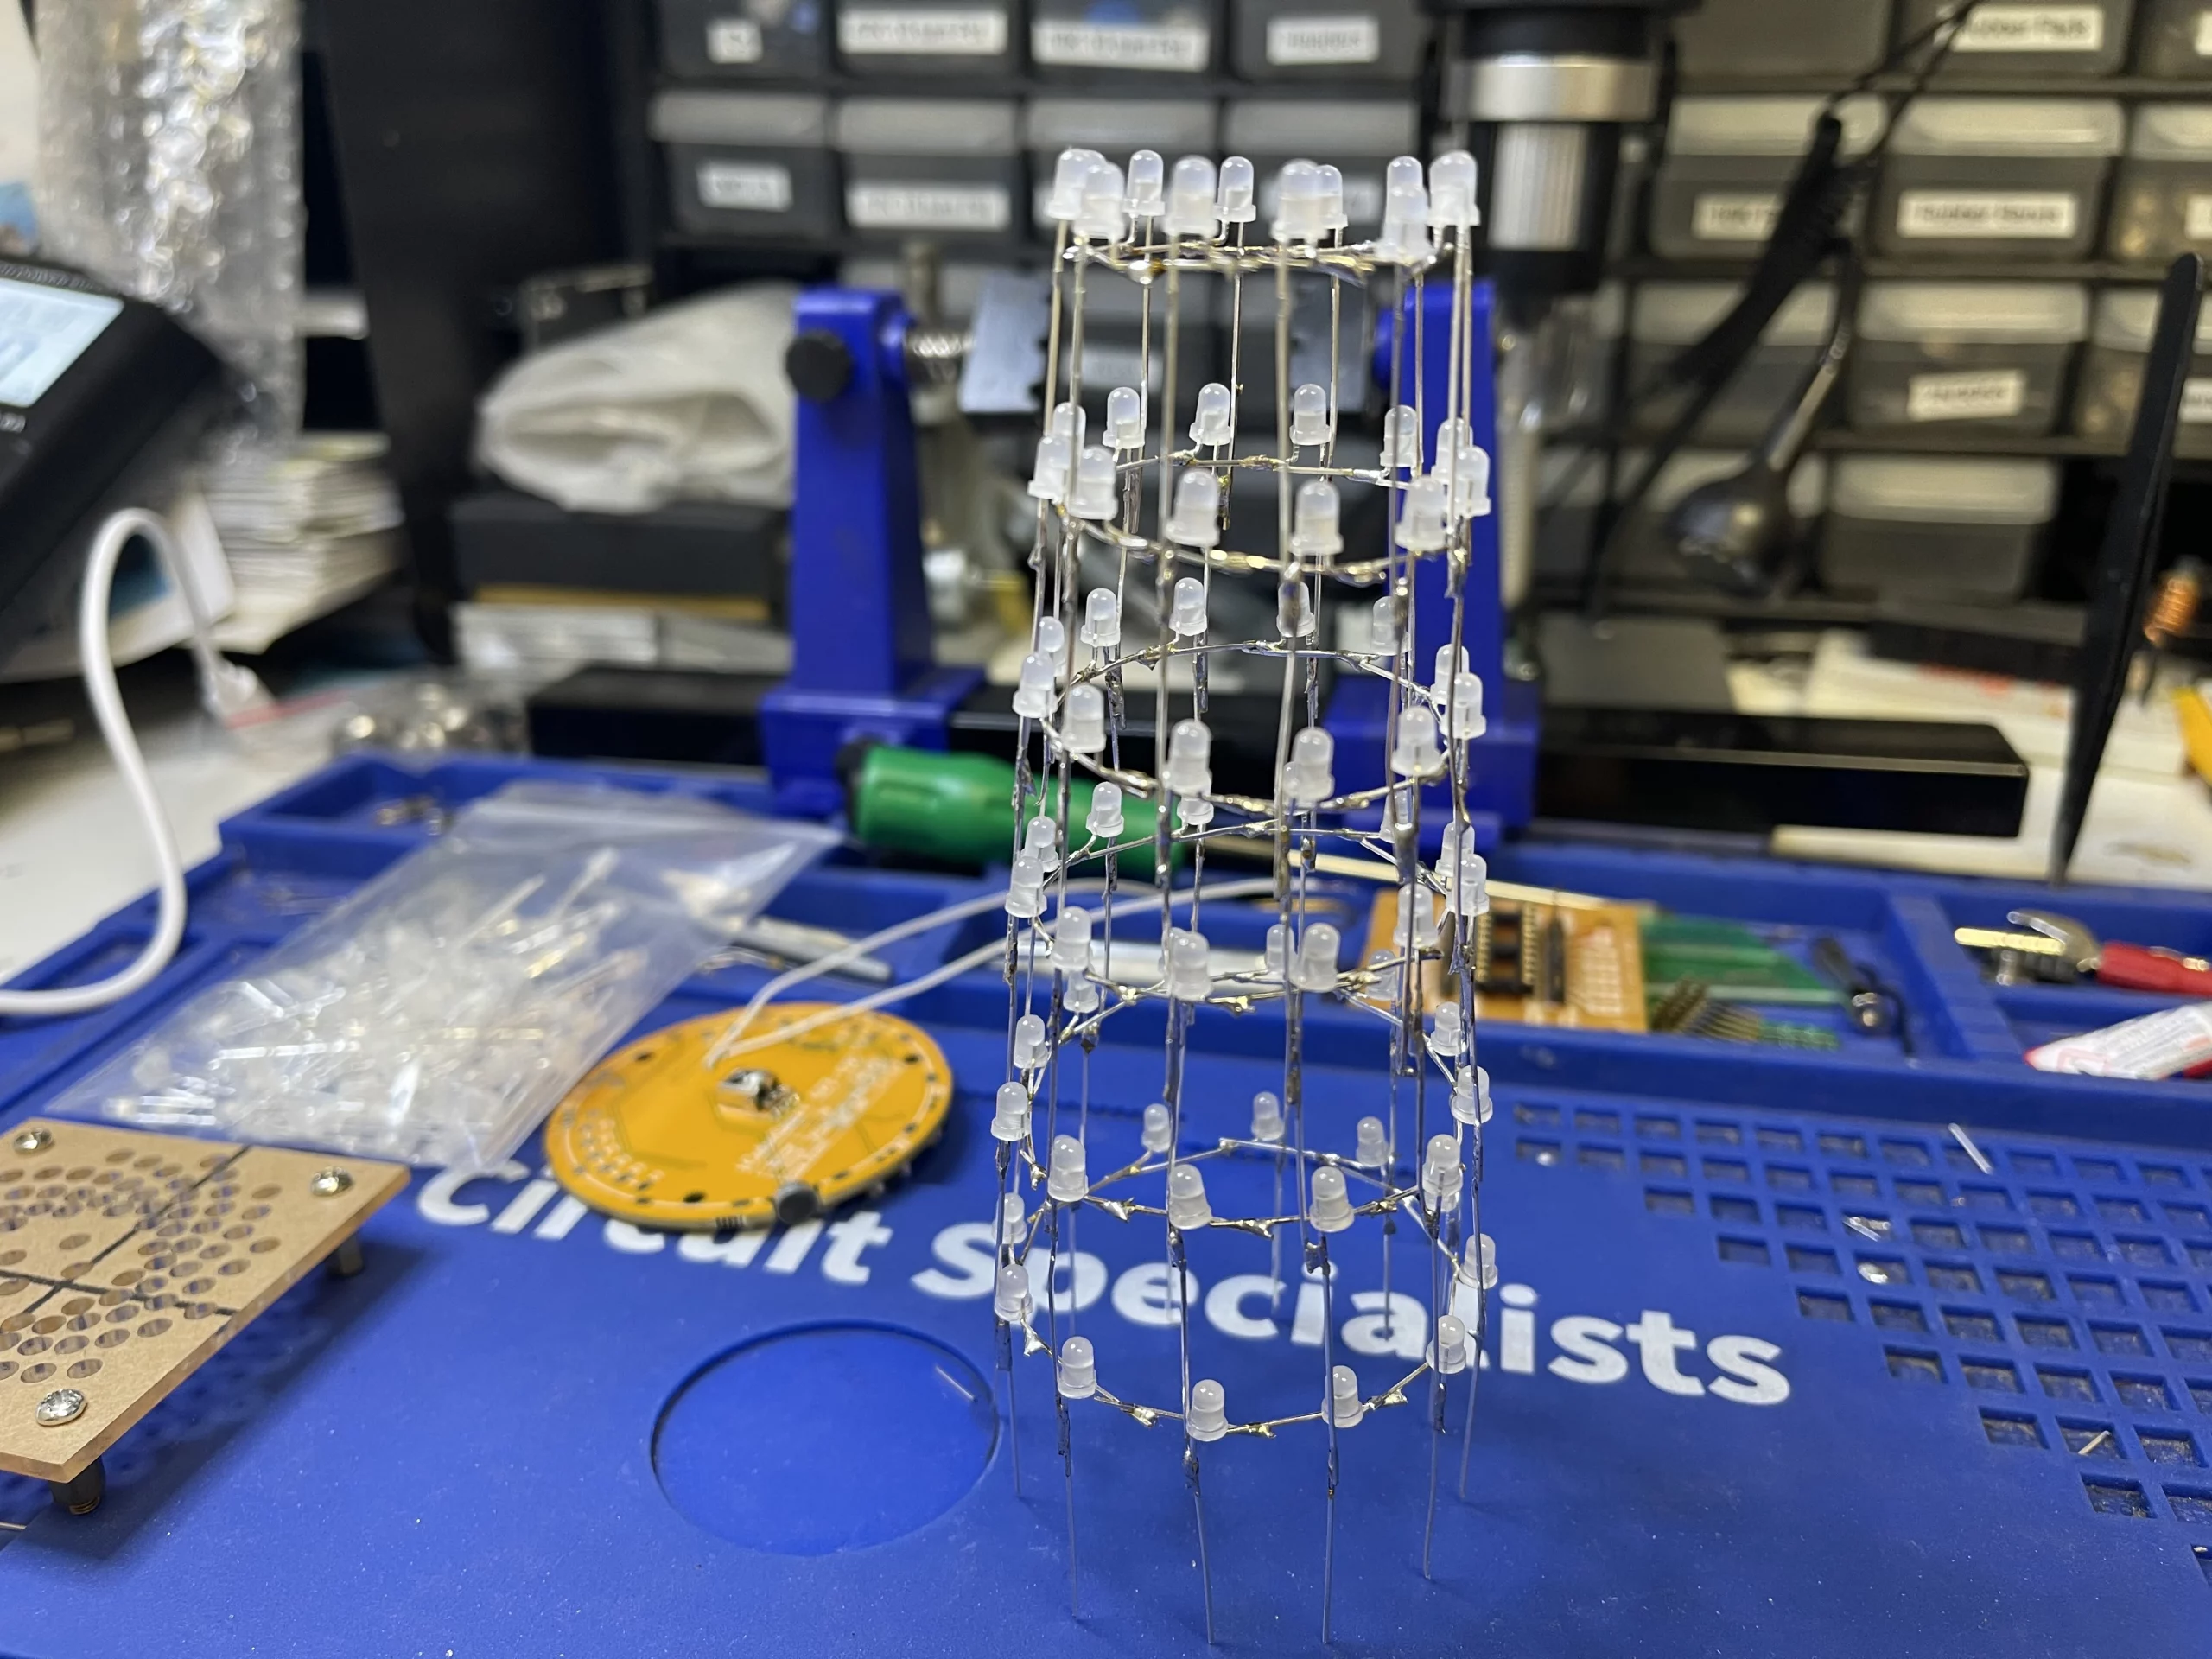
Once soldering all the LED rings together, carefully twist the structure to recreate the icon look of the Canton Tower. Before soldering the tower to the mainboard make sure to solder a wire from each level down to the bottom of the tower.
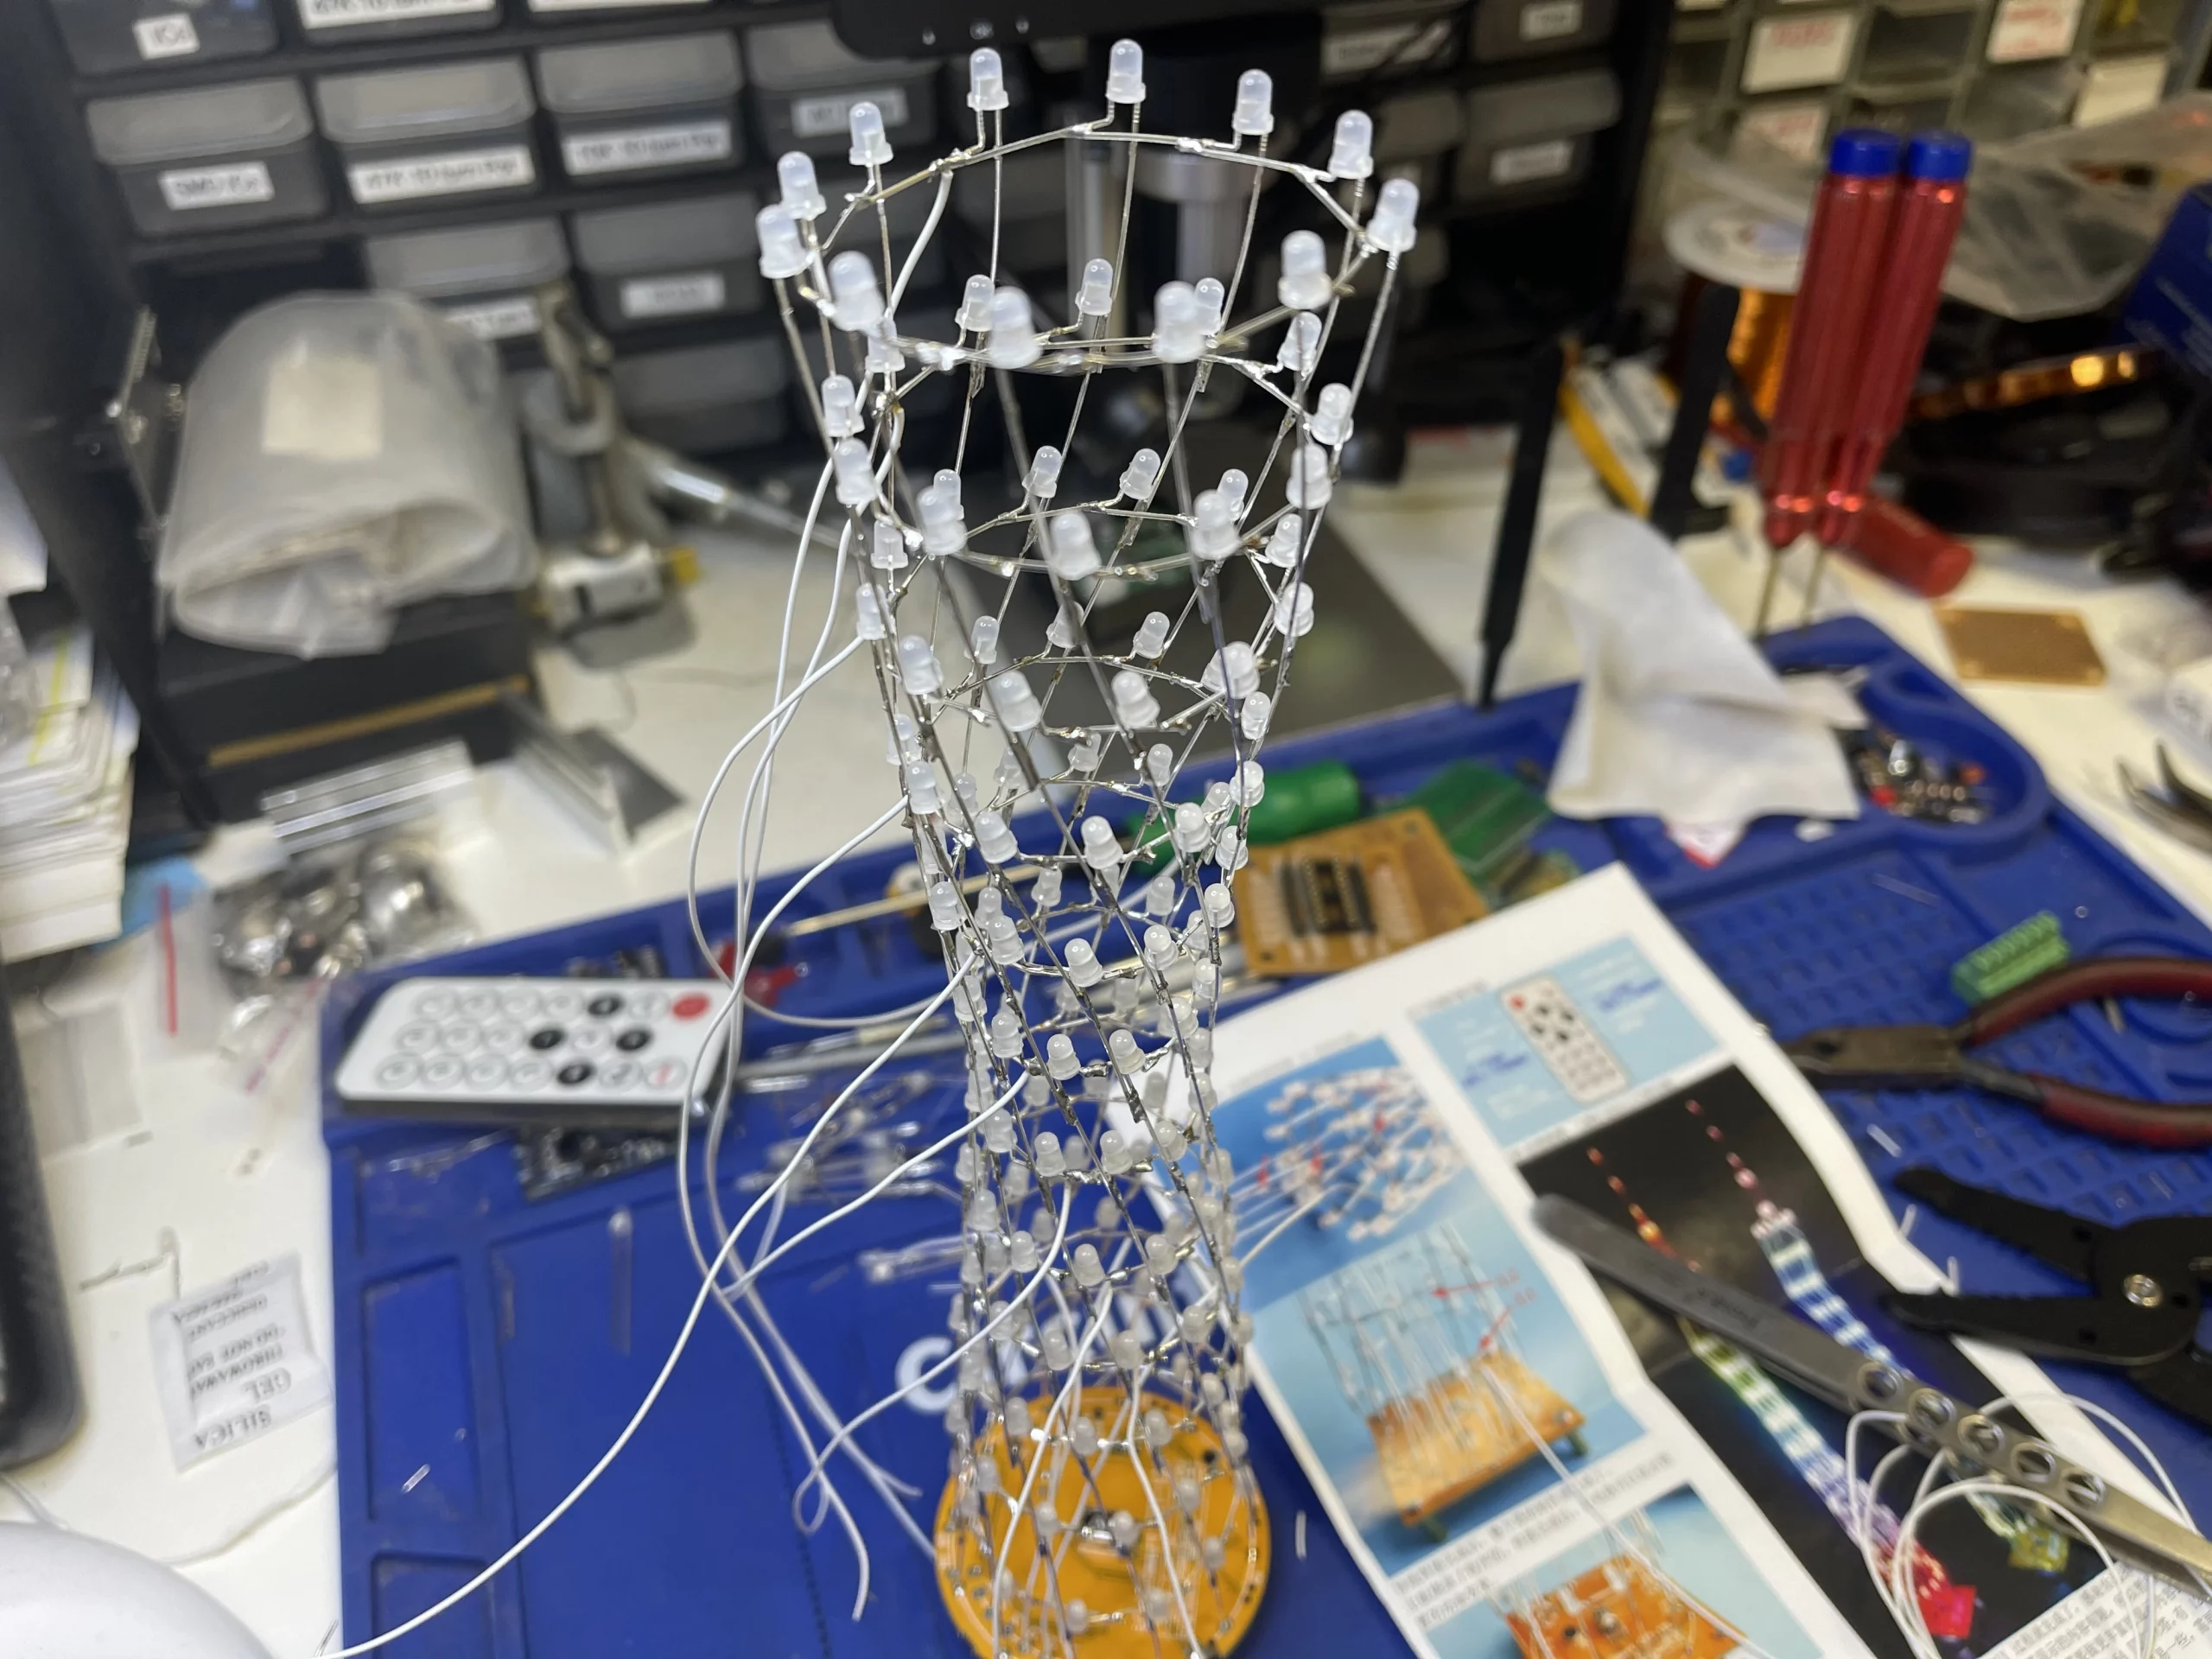
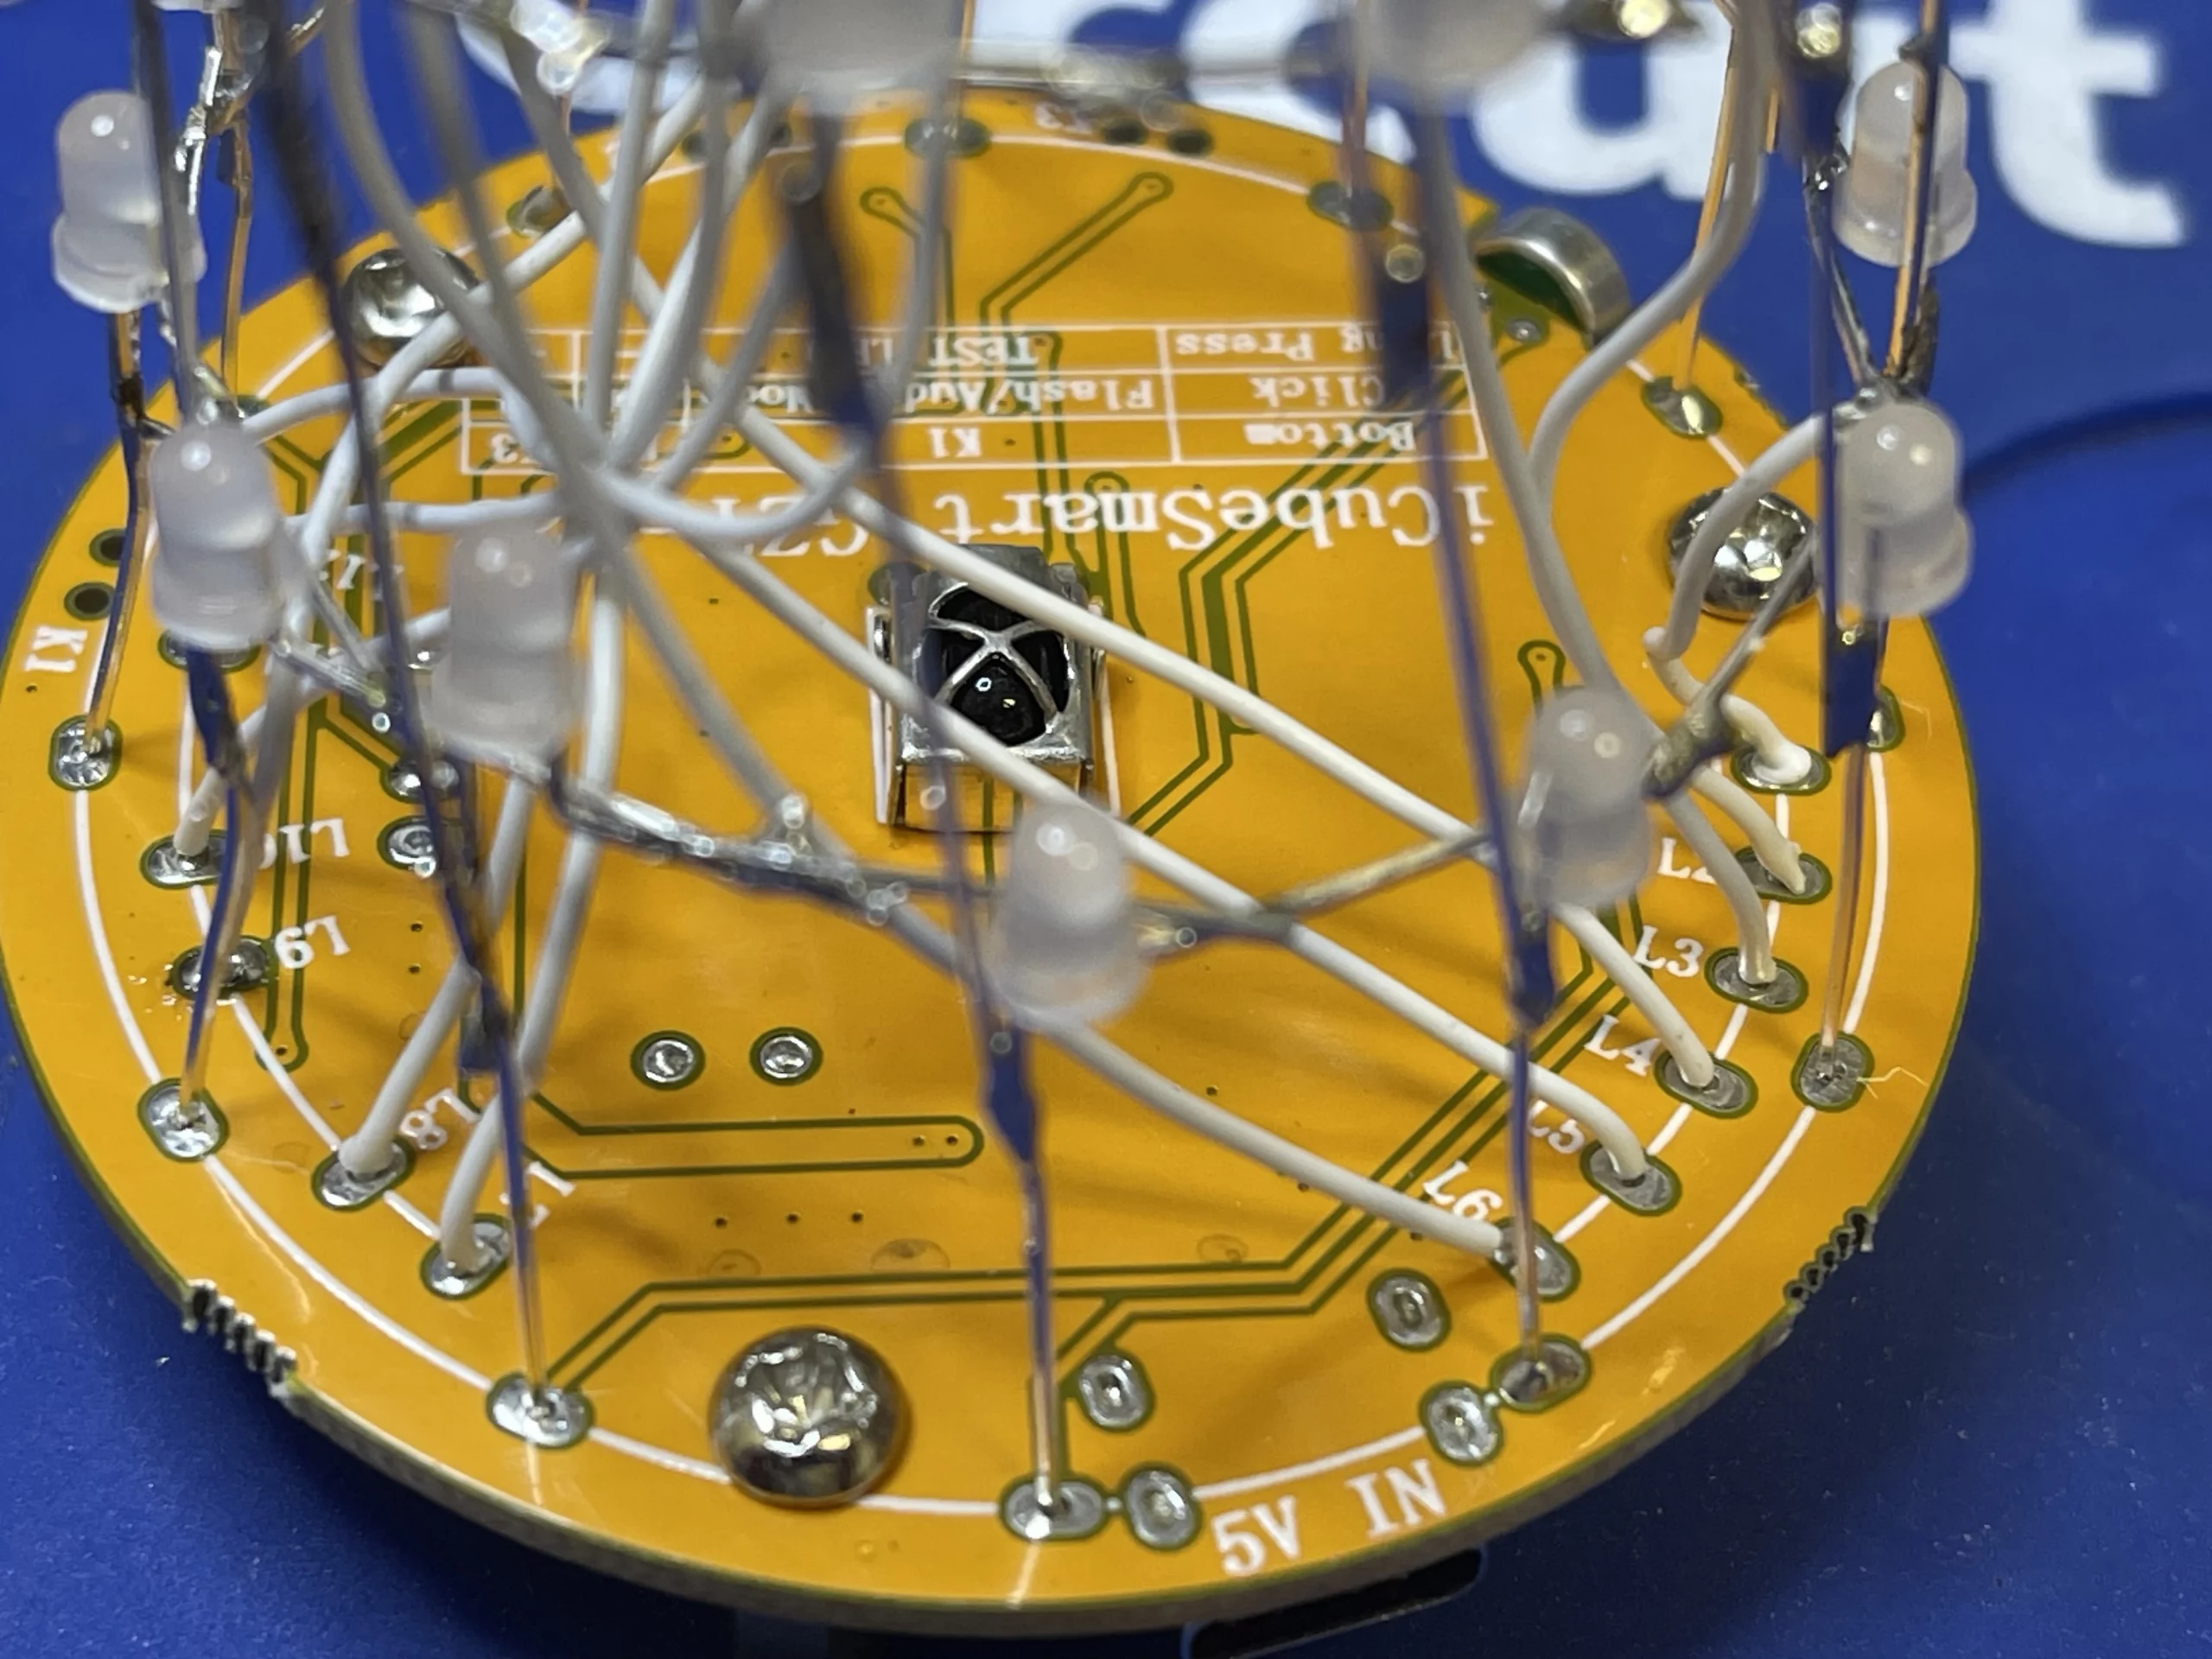
Once soldered each level with a wire, we can now solder each wire to the correct indicated location on the mainboard.
After all the soldering we now can take the first look at the tower by powering it up with the included USB cable.
After fixing all the small details, we can now control the tower with the included remote control
Troubleshooting: Common Issues and Solutions
First Struggle: LED Placement and Electrode Alignment
- Problem: Difficulty placing LEDs in the correct holes and aligning electrode legs for soldering.
- Solution:
- Take your time and work methodically to ensure each LED is properly seated and aligned.
- Use a pair of tweezers to gently guide the LEDs into place, if needed.
- Double-check the electrode legs are bent and touching the next LED’s negative electrode before soldering.
- Consider using a magnifying glass or lamp to improve visibility.
Second Struggle: Soldering Ring Levels Together
- Problem: Difficulty soldering one ring level to another due to size differences and ensuring correct polarity.
- Solution:
- To address size differences:
- Gently flex the larger ring to fit snugly over the smaller one.
- Use a small amount of force to align the rings, but avoid applying too much pressure.
- To ensure correct polarity:
- Double-check the electrode leg orientation before soldering.
- Verify that the positive electrode (anode) of one ring aligns with the negative electrode (cathode) of the next ring.
- To address size differences:
Final Struggle: Connecting Wires to the Mainboard
- Problem: Difficulty soldering wires from each level to the correct location on the mainboard.
- Solution:
- To ensure correct connections:
- Make sure wires are slightly longer than needed to allow for flexibility and ease of connection.
- Then label each wire clearly to indicate which level it corresponds to.
- Finally, double-check the mainboard diagram or instructions to confirm the correct connection points.
- To ensure correct connections:
Congratulations on completing your DIY 155 LED Canton Tower! You’ve successfully combined soldering skills and patience to create a unique and eye-catching piece. Take pride in your accomplishments and enjoy the satisfaction of creating something with your own hands. If you’re looking for your next challenge, be sure to check out our selection of electronic soldering projects for more exciting DIY adventures!
We hope the photos and instructions in this guide have helped make this project a success. If you have any feedback or suggestions, please don’t hesitate to share them with us.